How fill complete ACI
This guide will walk you through the necessary steps to fill in and submit the ACI on the ACI Libya platform.
Go to aci.customs.gov.ly
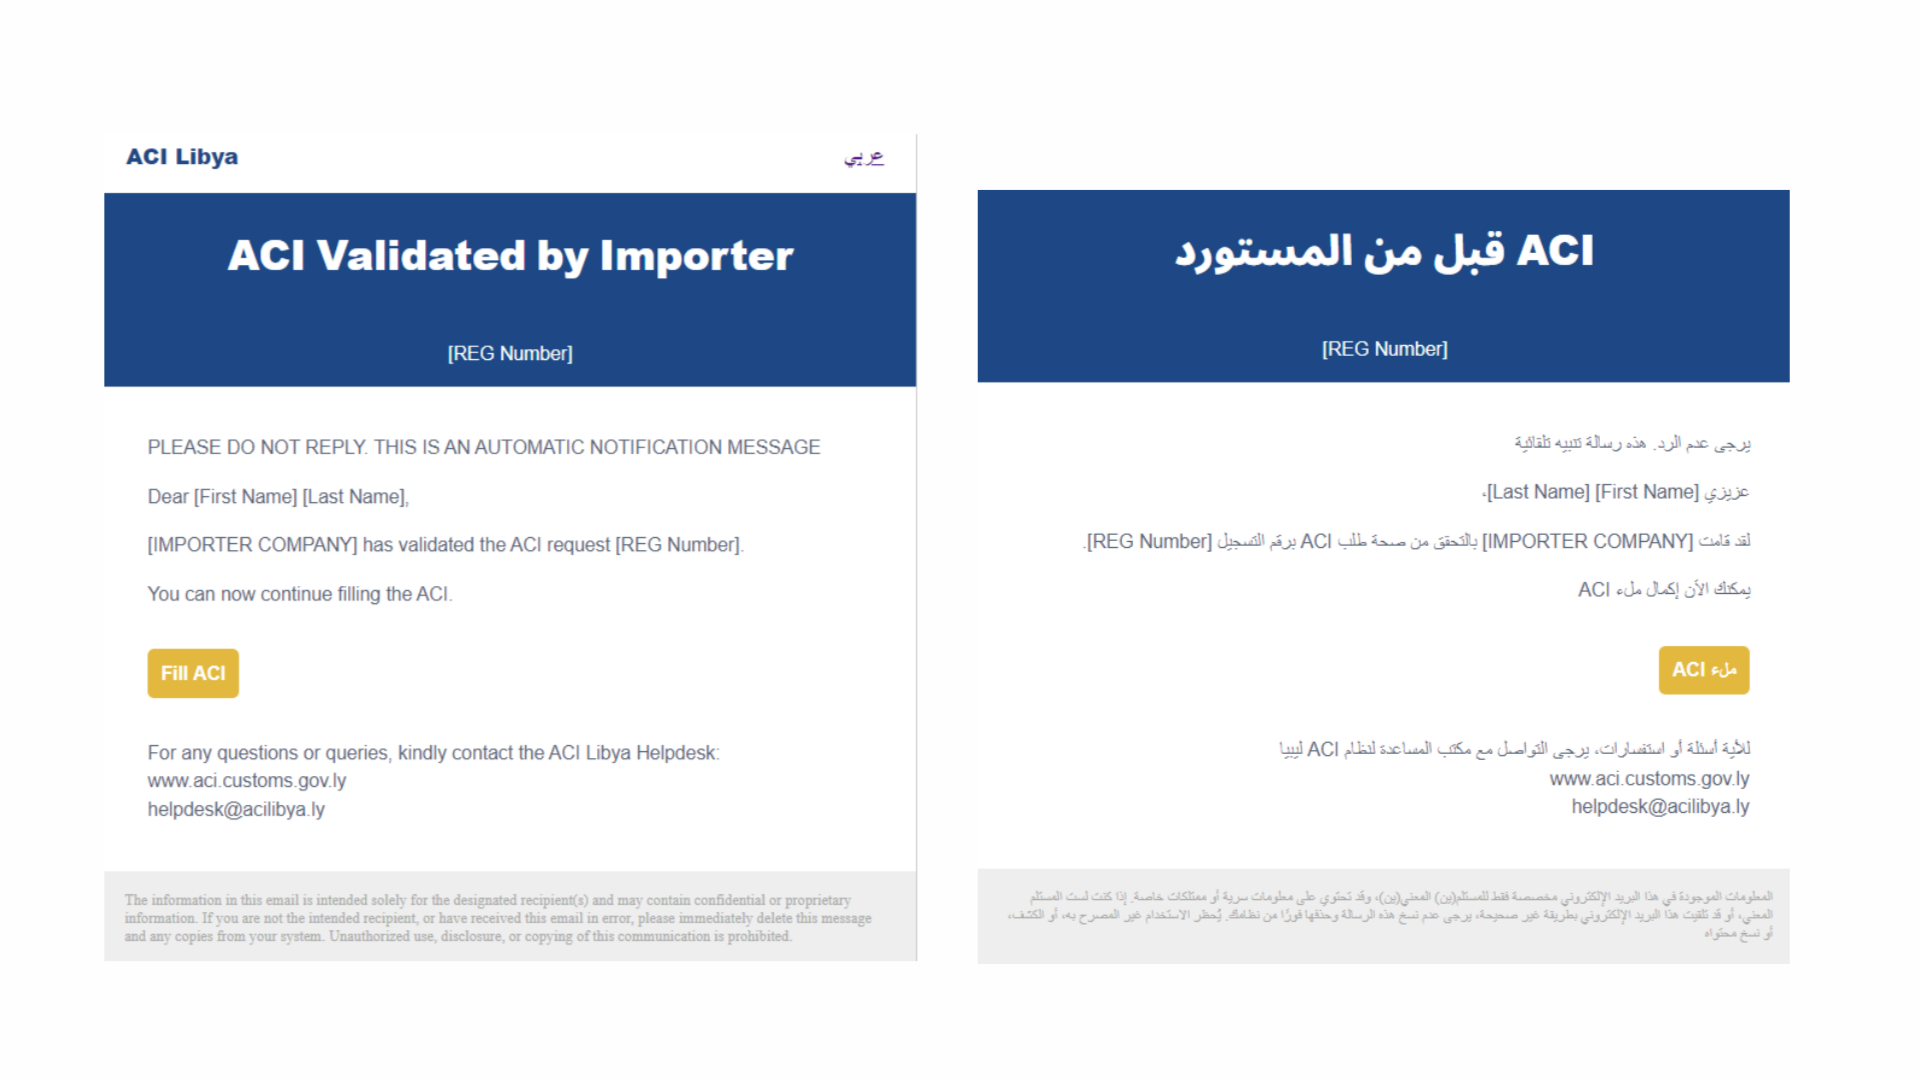
1. Notification of importer validation
The process begins when the exporter receives an email informing them that the importer has validated the details initially submitted.
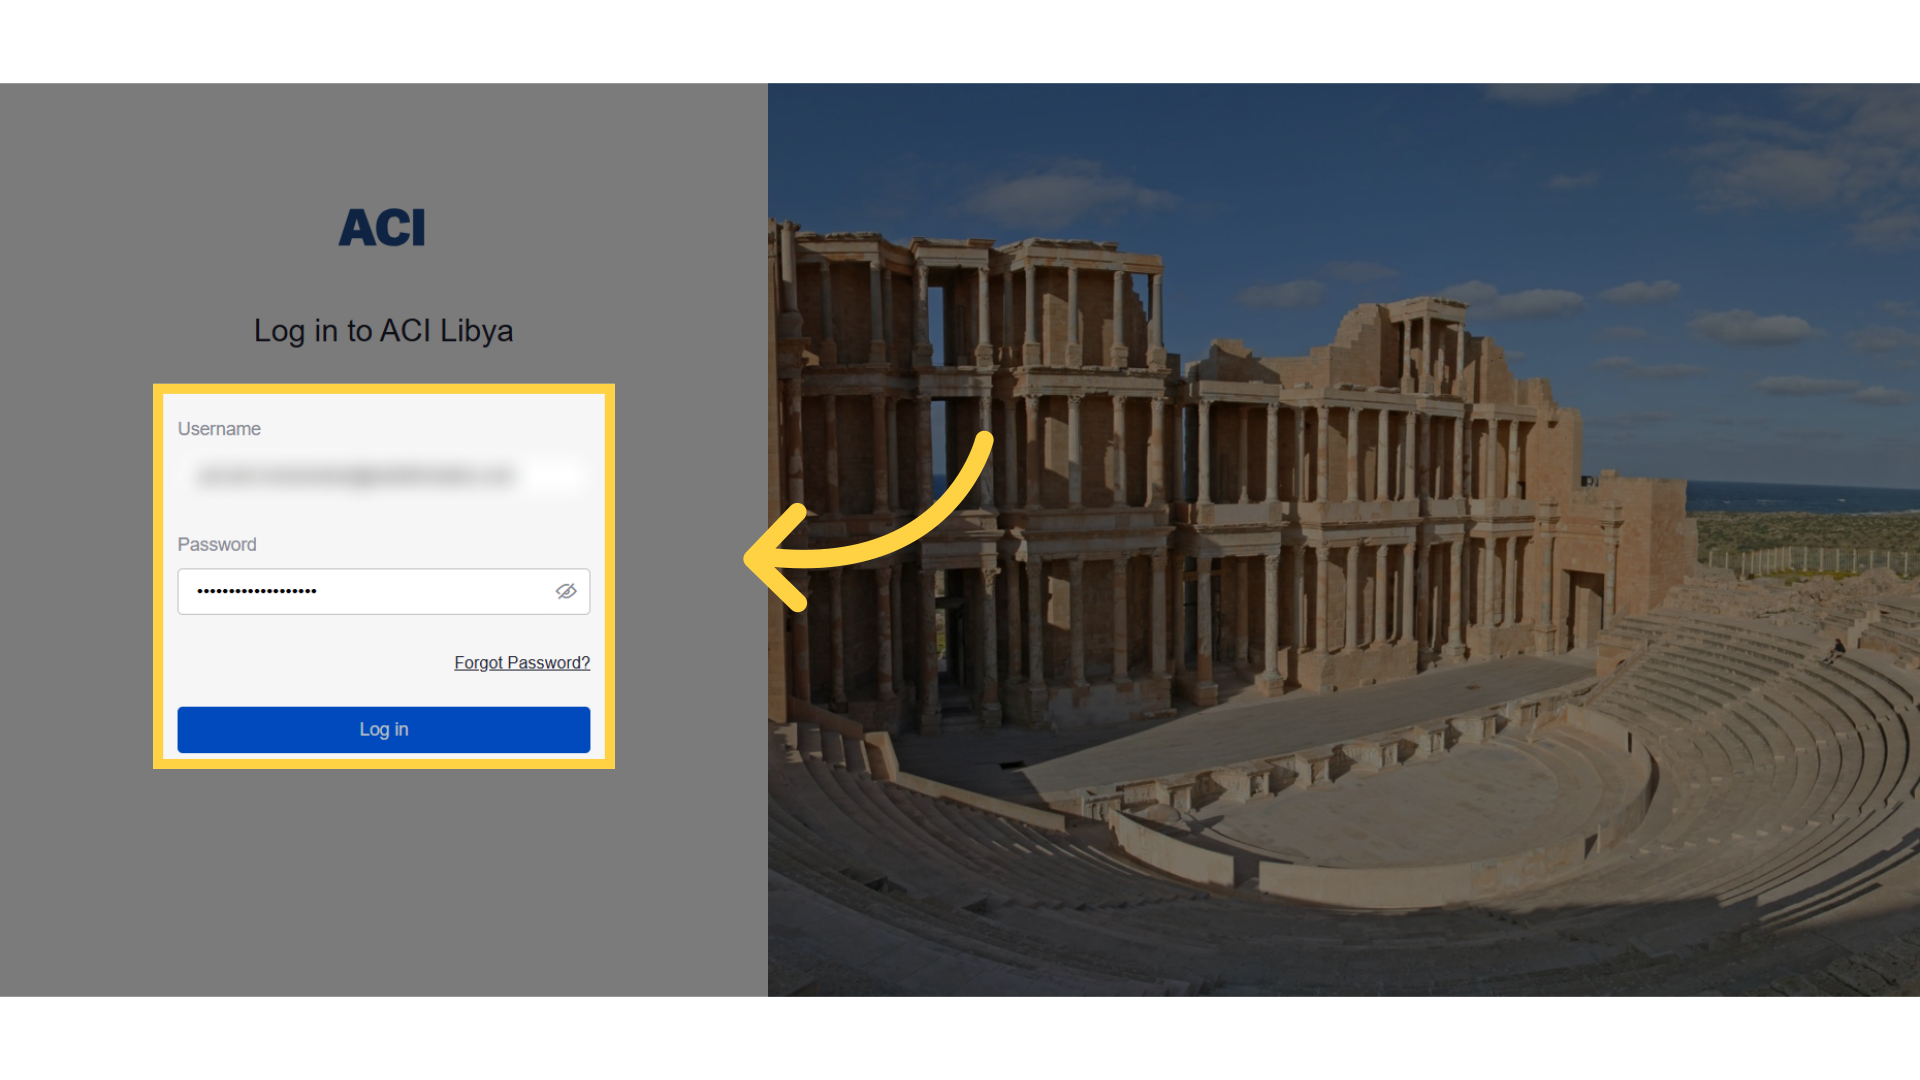
2. Login to the System
The initial step is to access the ACI system using the exporter designated login credentials.
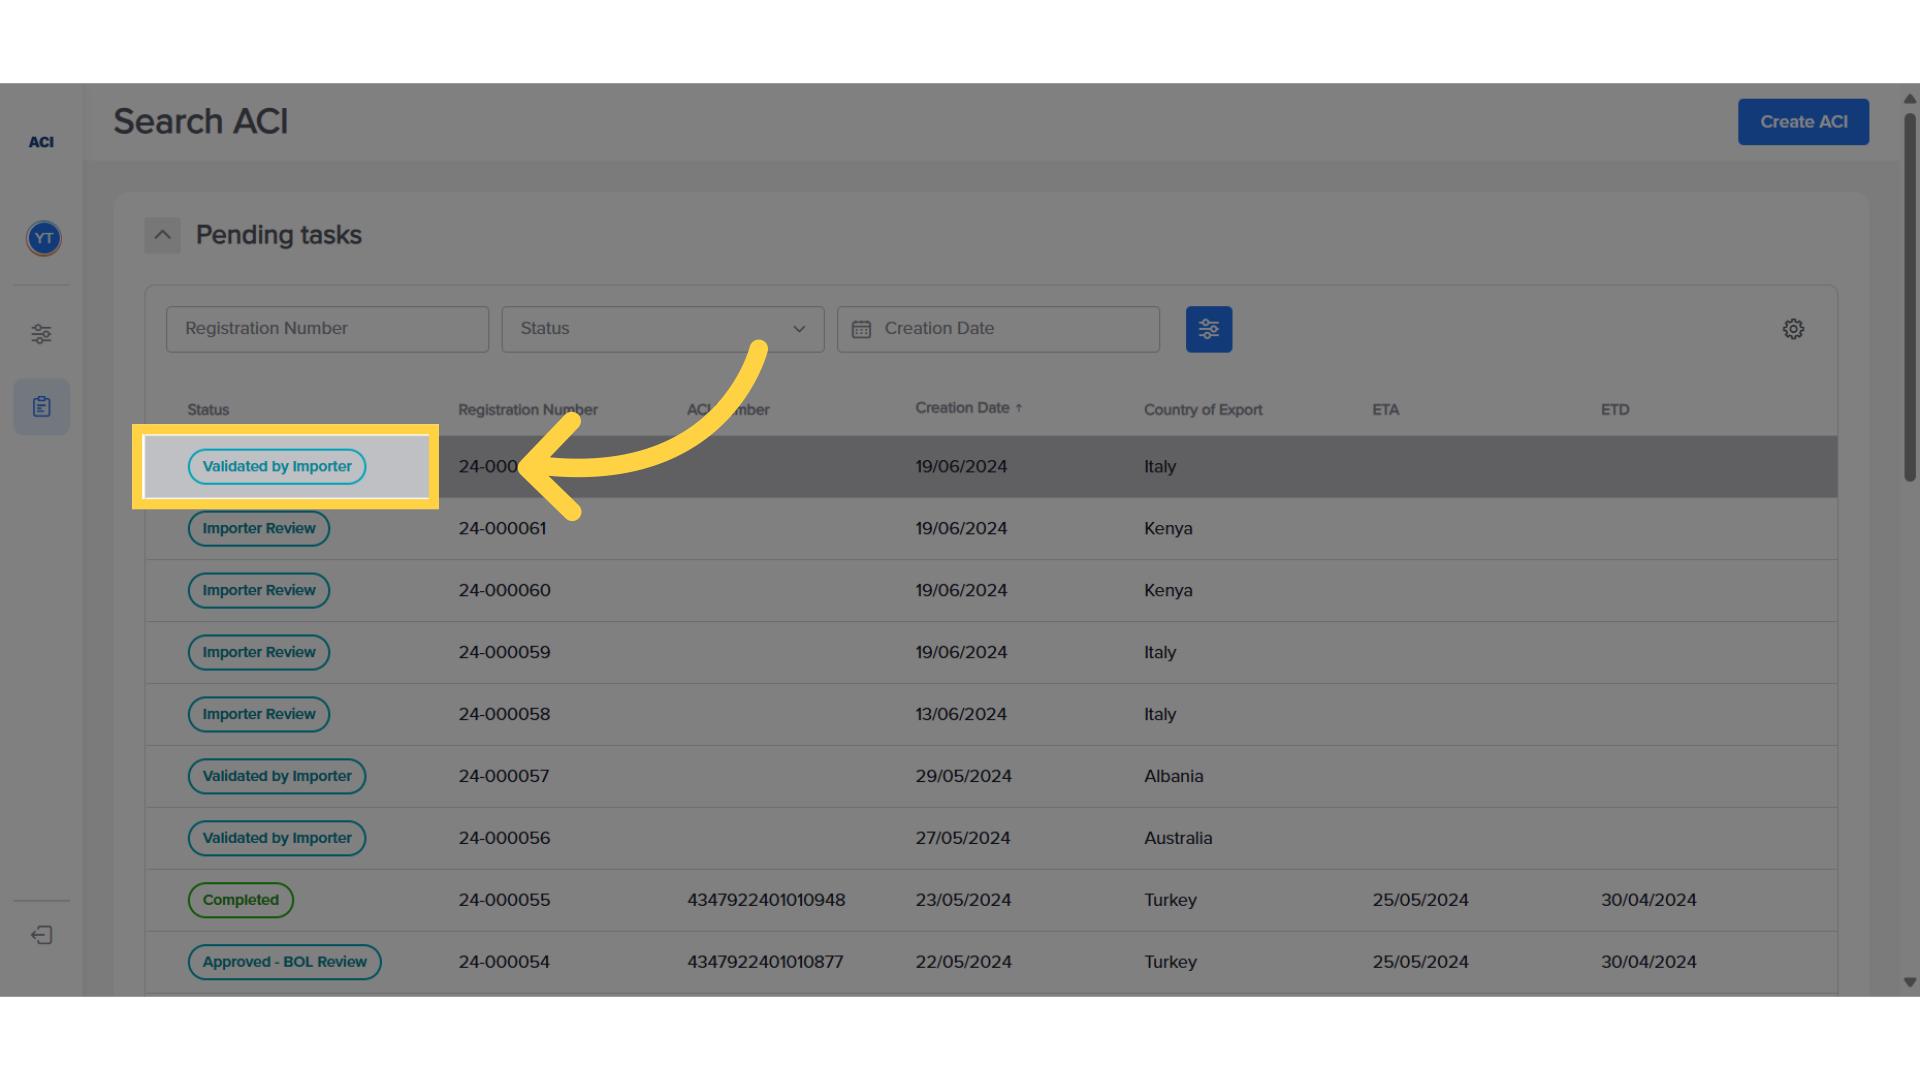
3. Select ACI to fill in
Access the corresponding ACI from the link in the email or from the ACI dashboard.
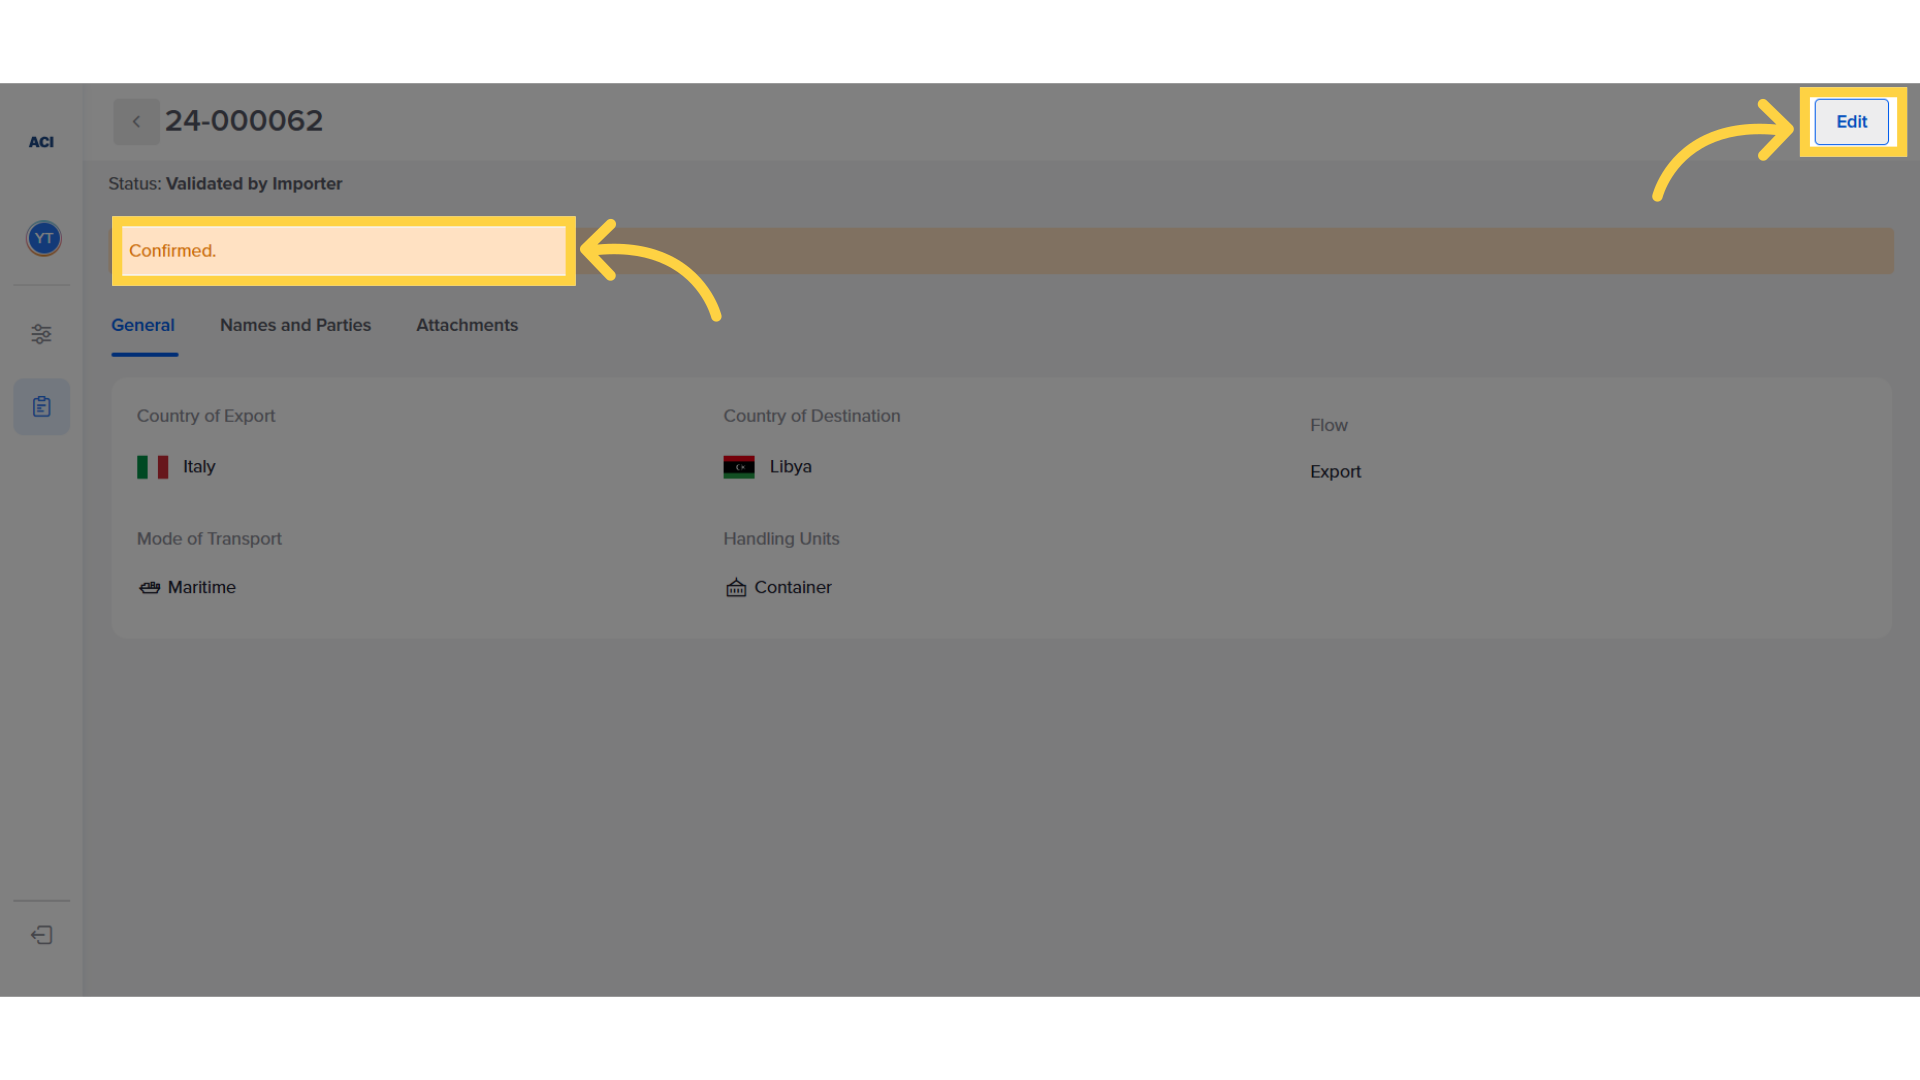
4. Check importer messages and click "Edit" to fill ACI
Any message left by the importer in both cases of acceptance or rejection is shown on the top left. The exporter then clicks on the "Edit" option to proceed with filling in the requested information.
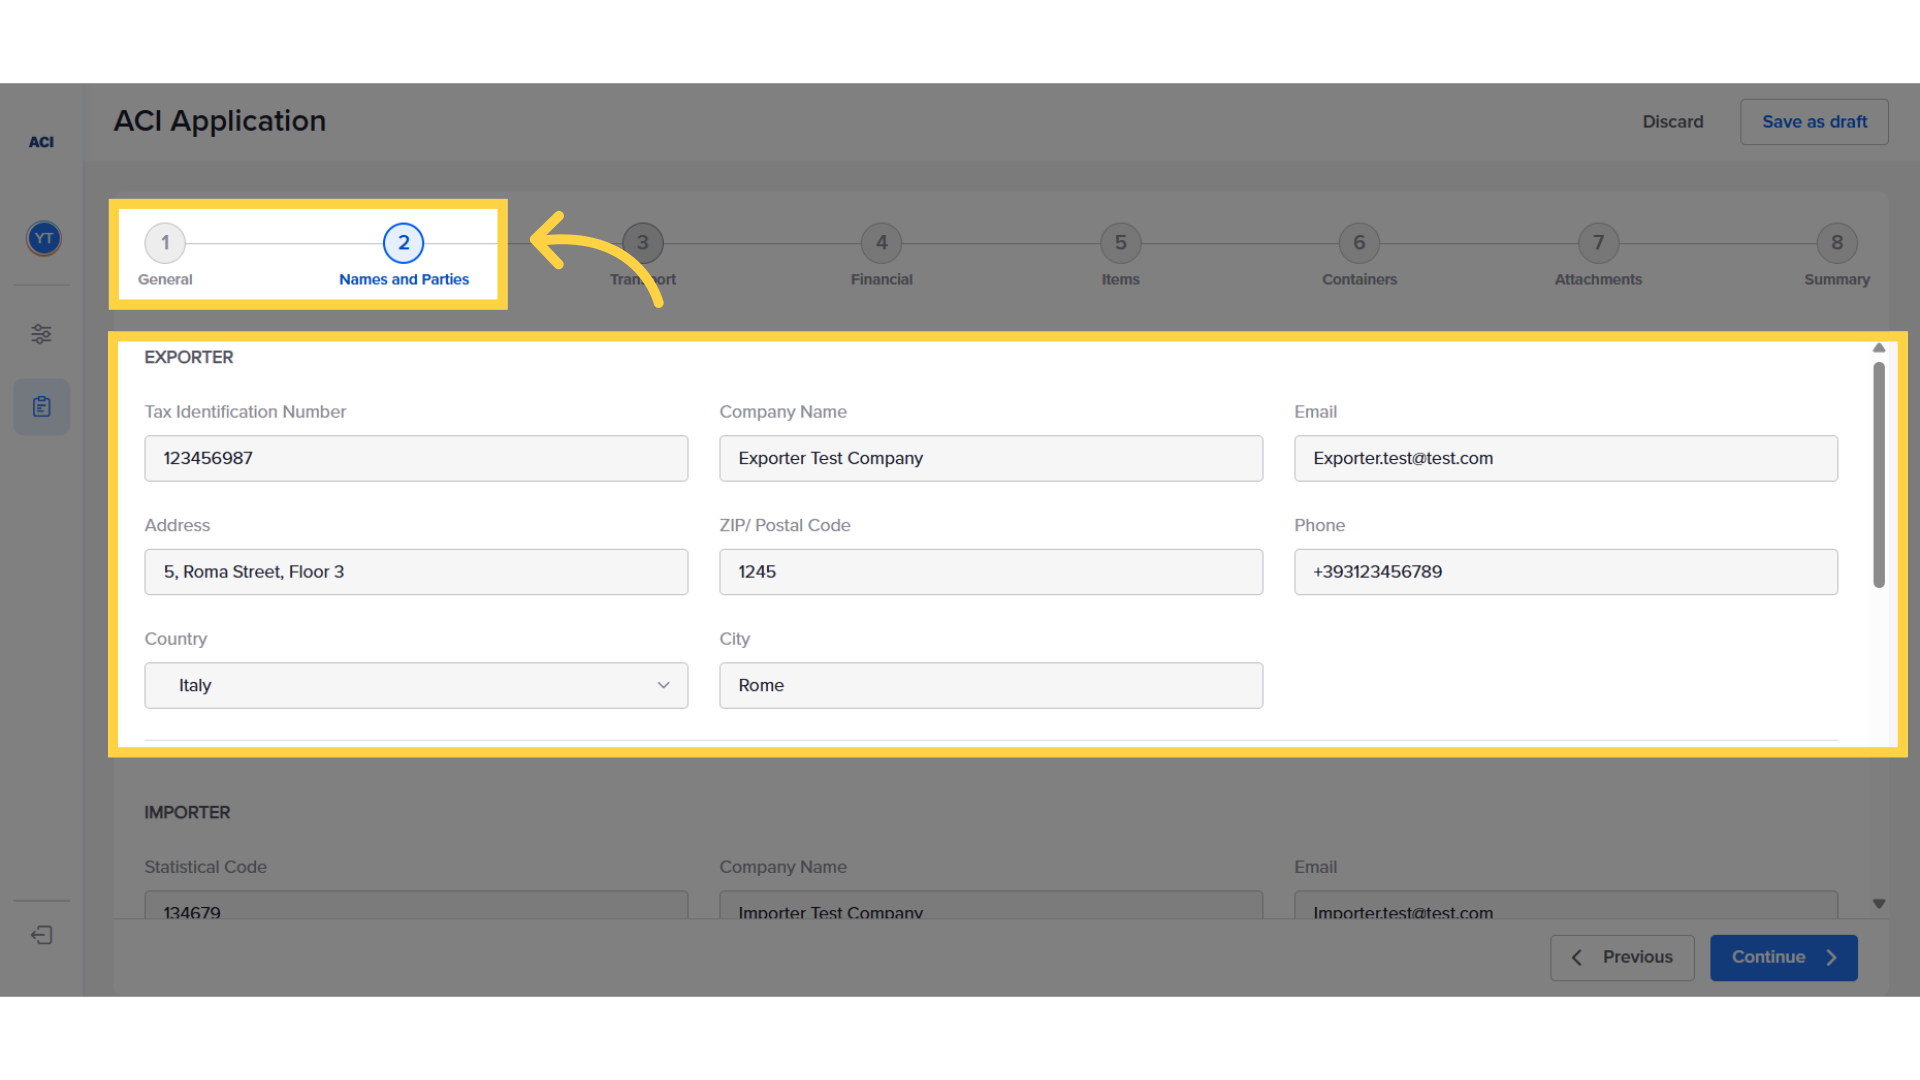
5. Review Details
The general details, including names and parties, are already included and can not be changed.
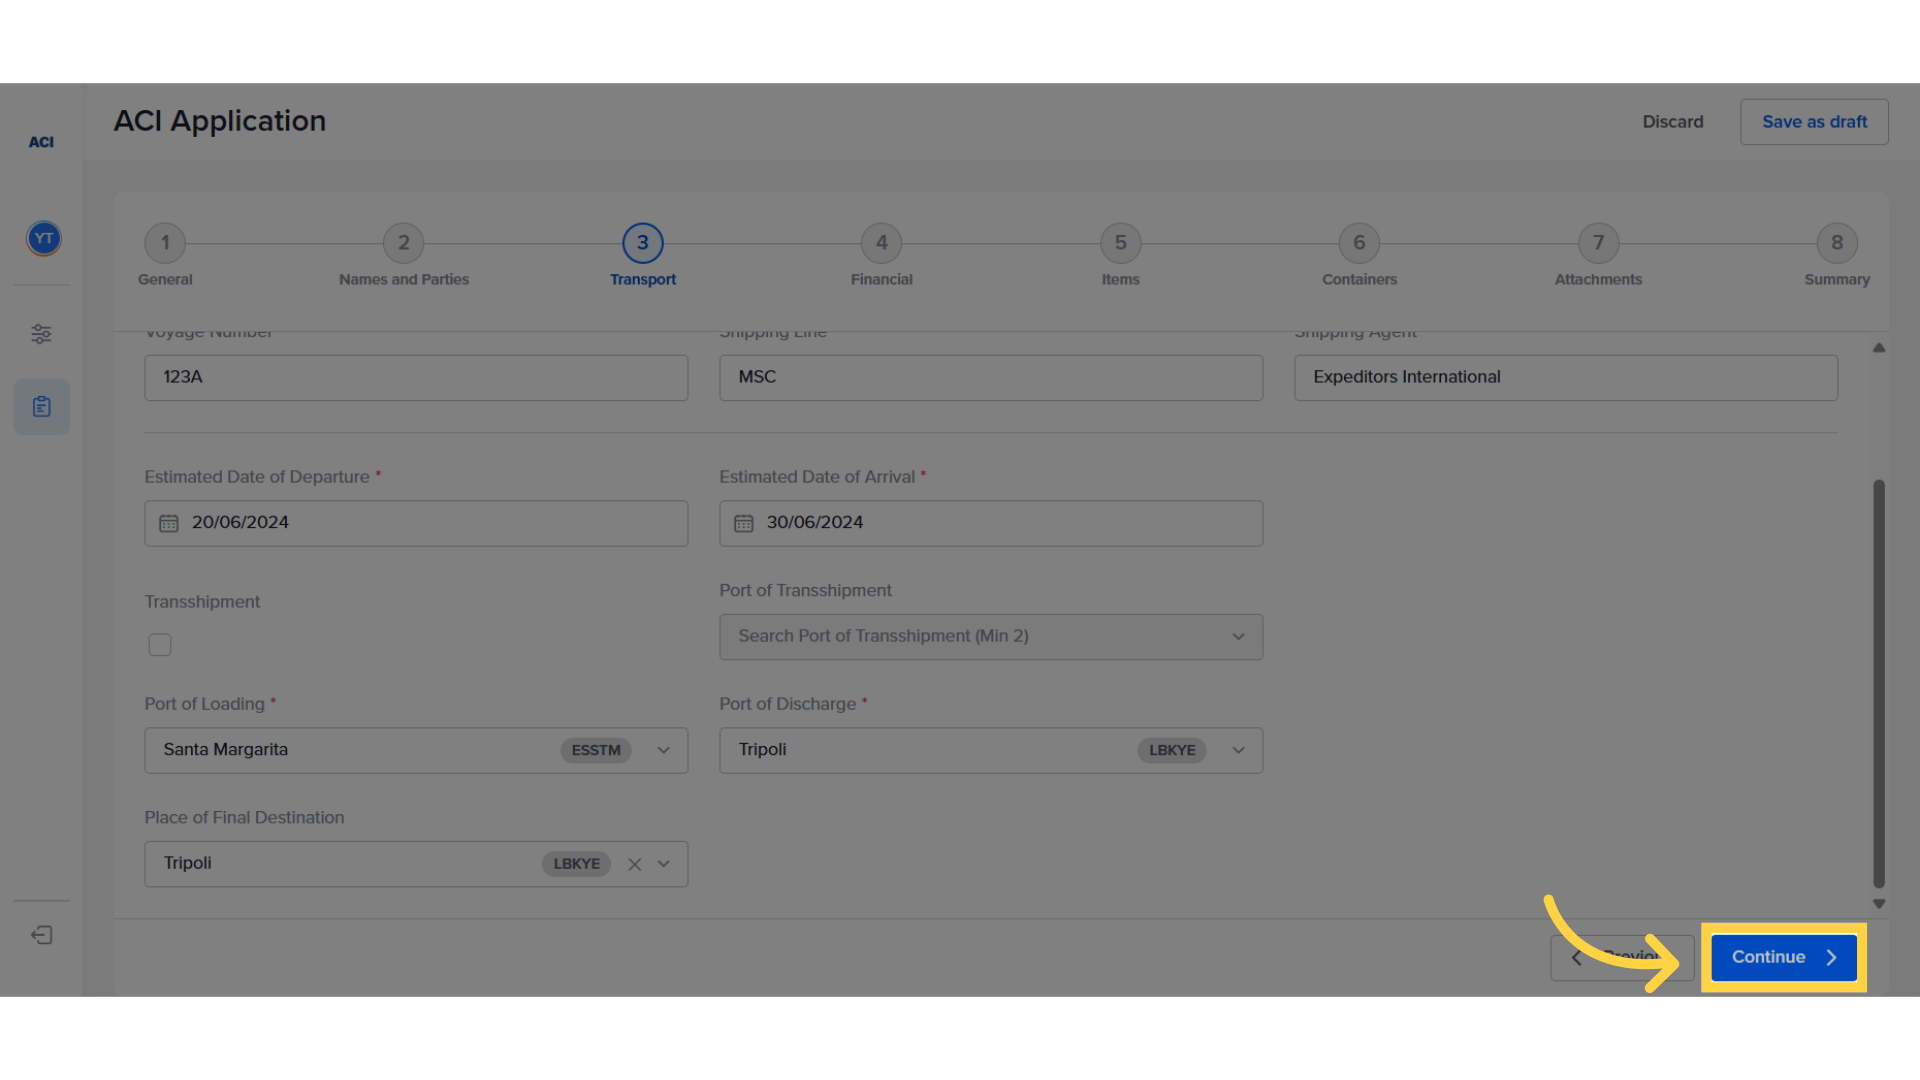
6. Insert " Transport details "
The exporter proceeds by filling in all the required information in the transport tab. Note that details marked with an asterisk are mandatory.

7. Proceed to next step
After finishing each step, proceed by clicking on "Continue". It is not mandatory to fill all fields in the first run. You can revisit the pages to add information later.
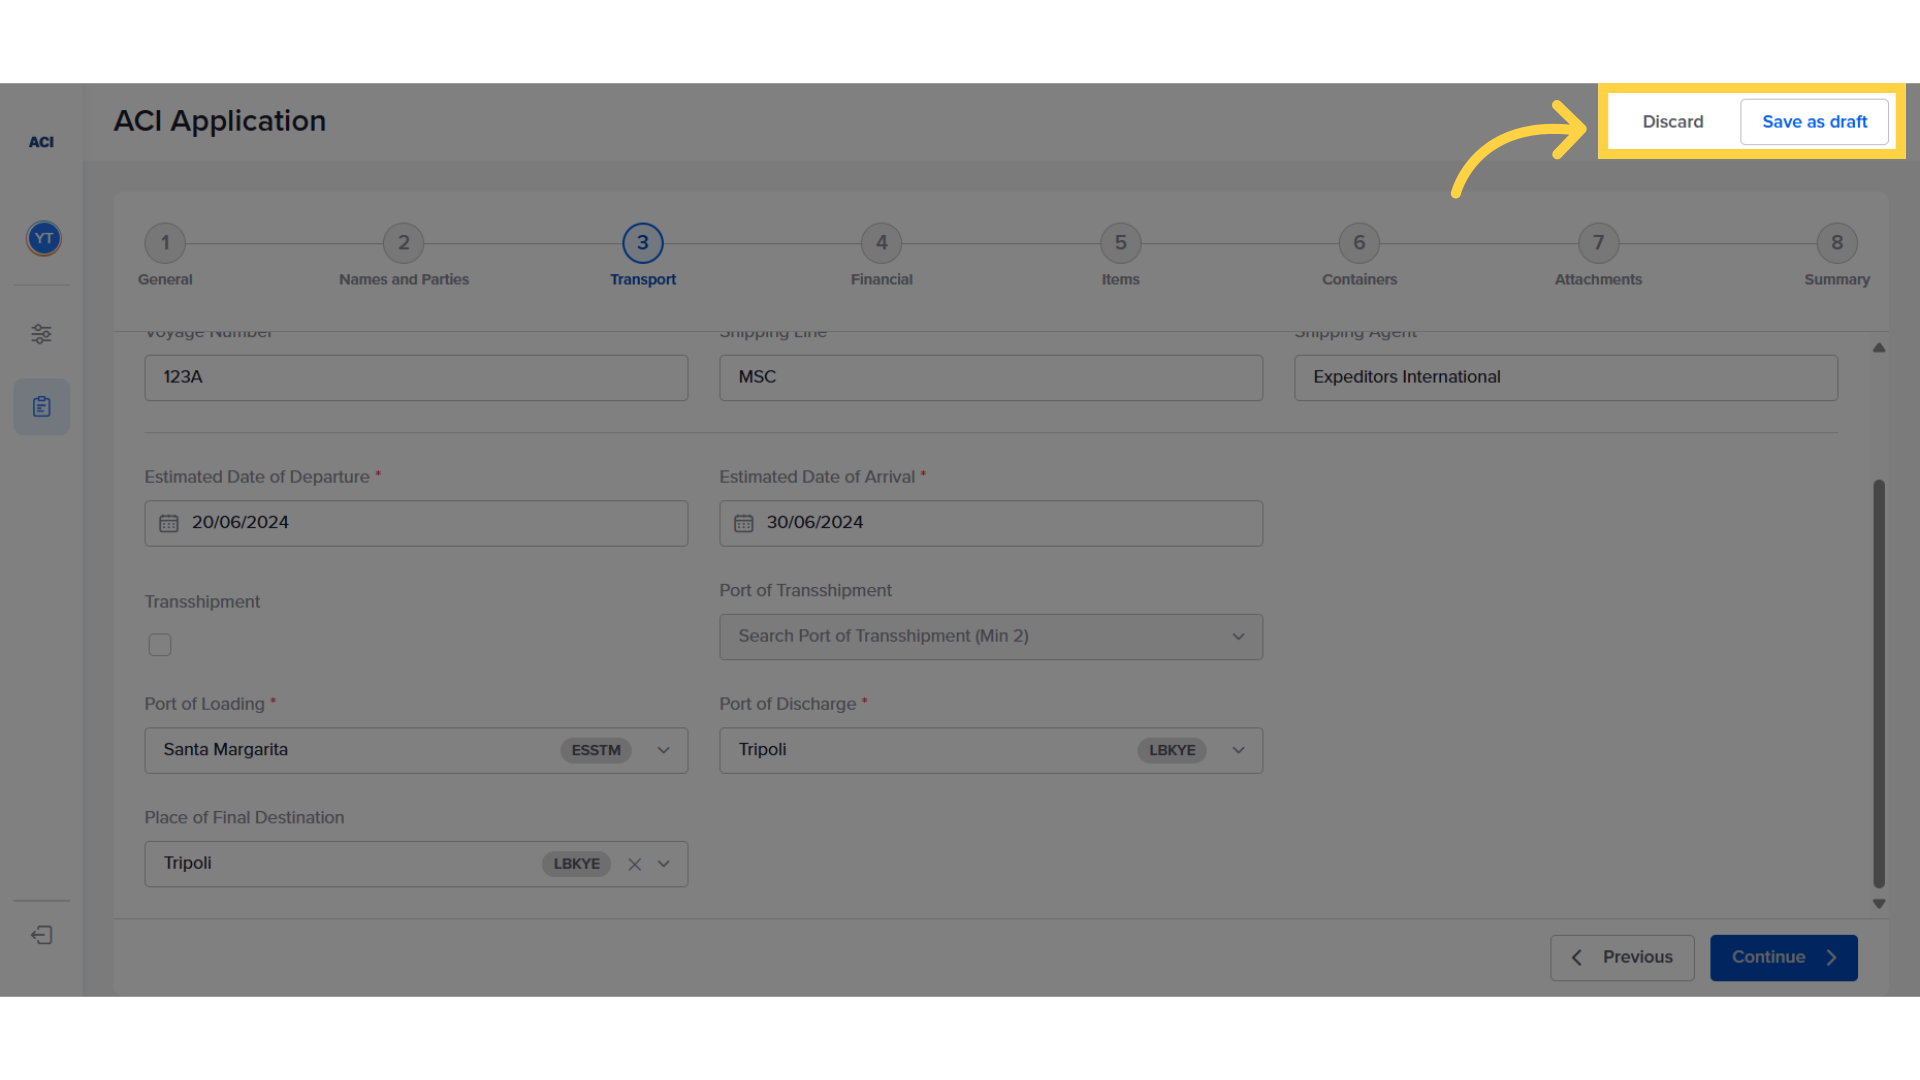
8. Click "Save as draft" to continue filling the ACI later
At any point in the process, you can save your progress and continue at a later time. Pressing discard exits the ACI without saving your last changes.
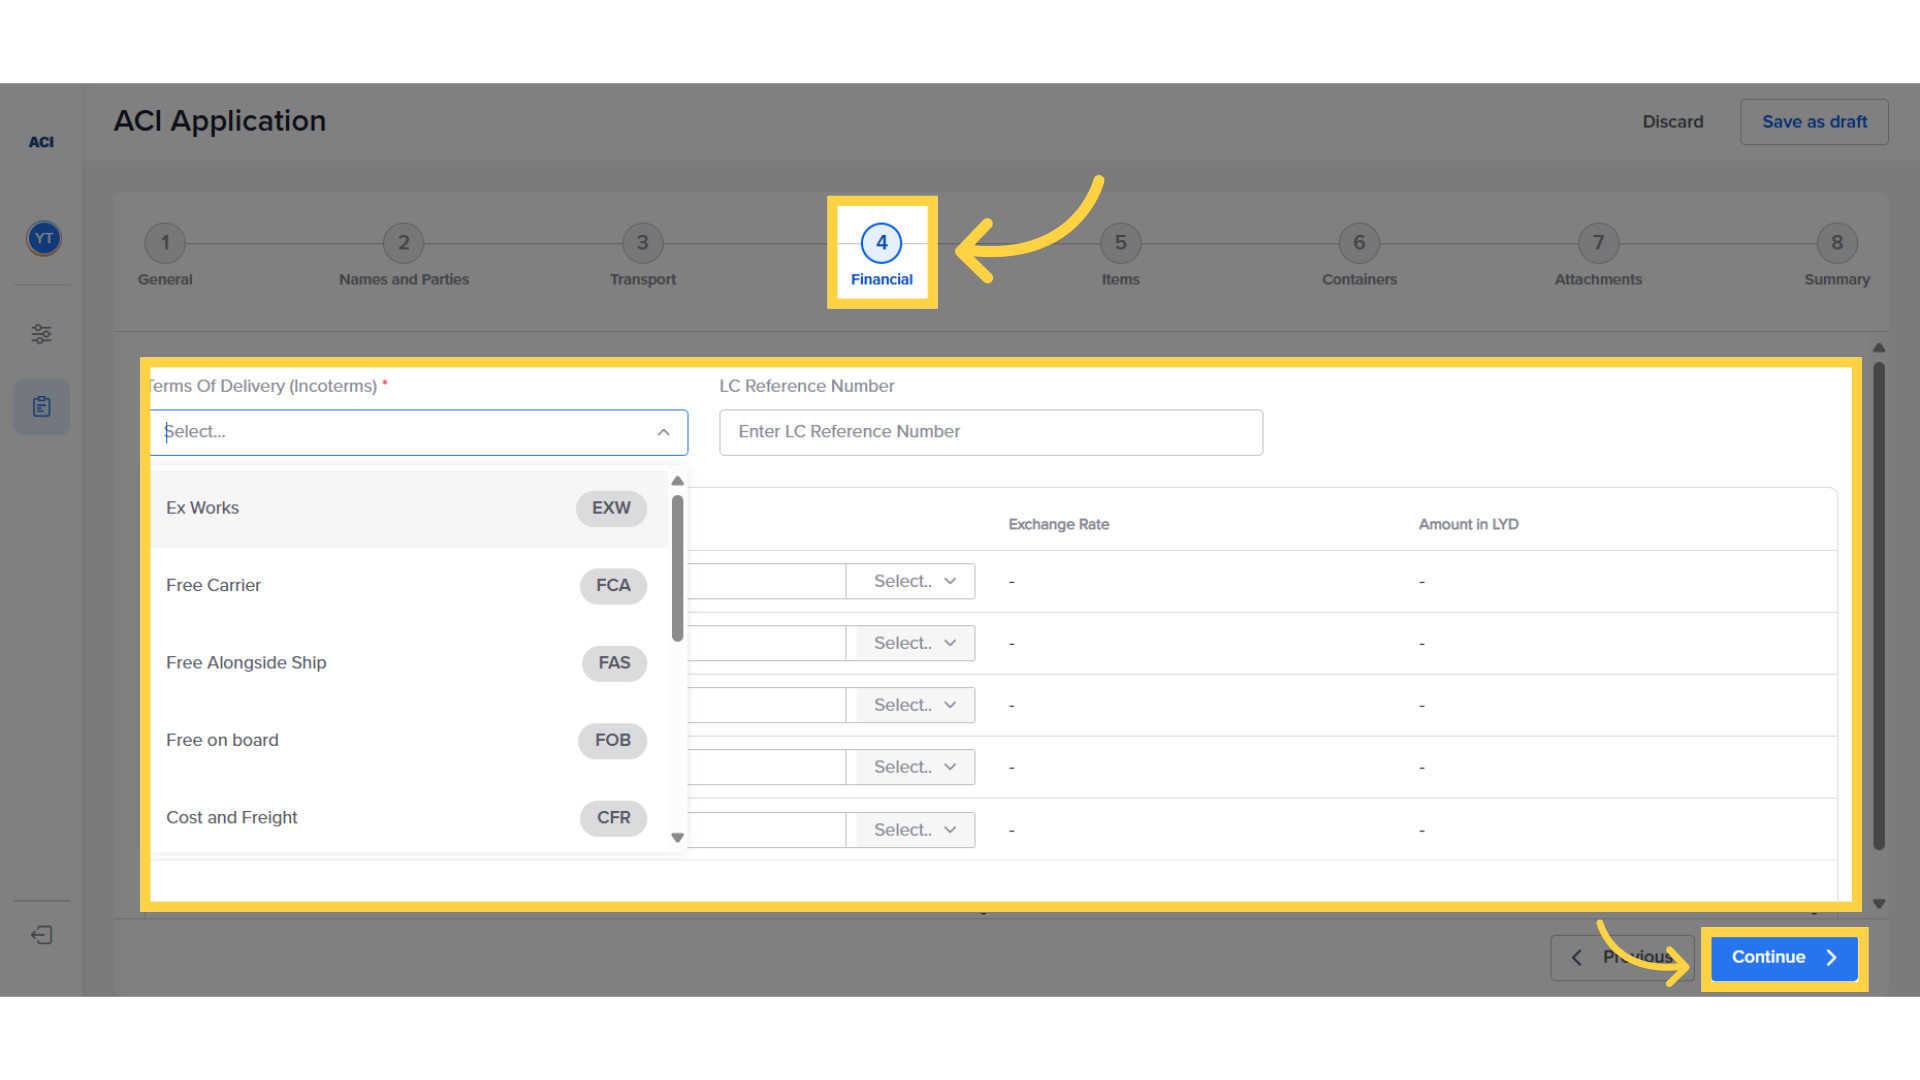
9. Insert " Financial details"
The subsequent step involves entering the financial details.
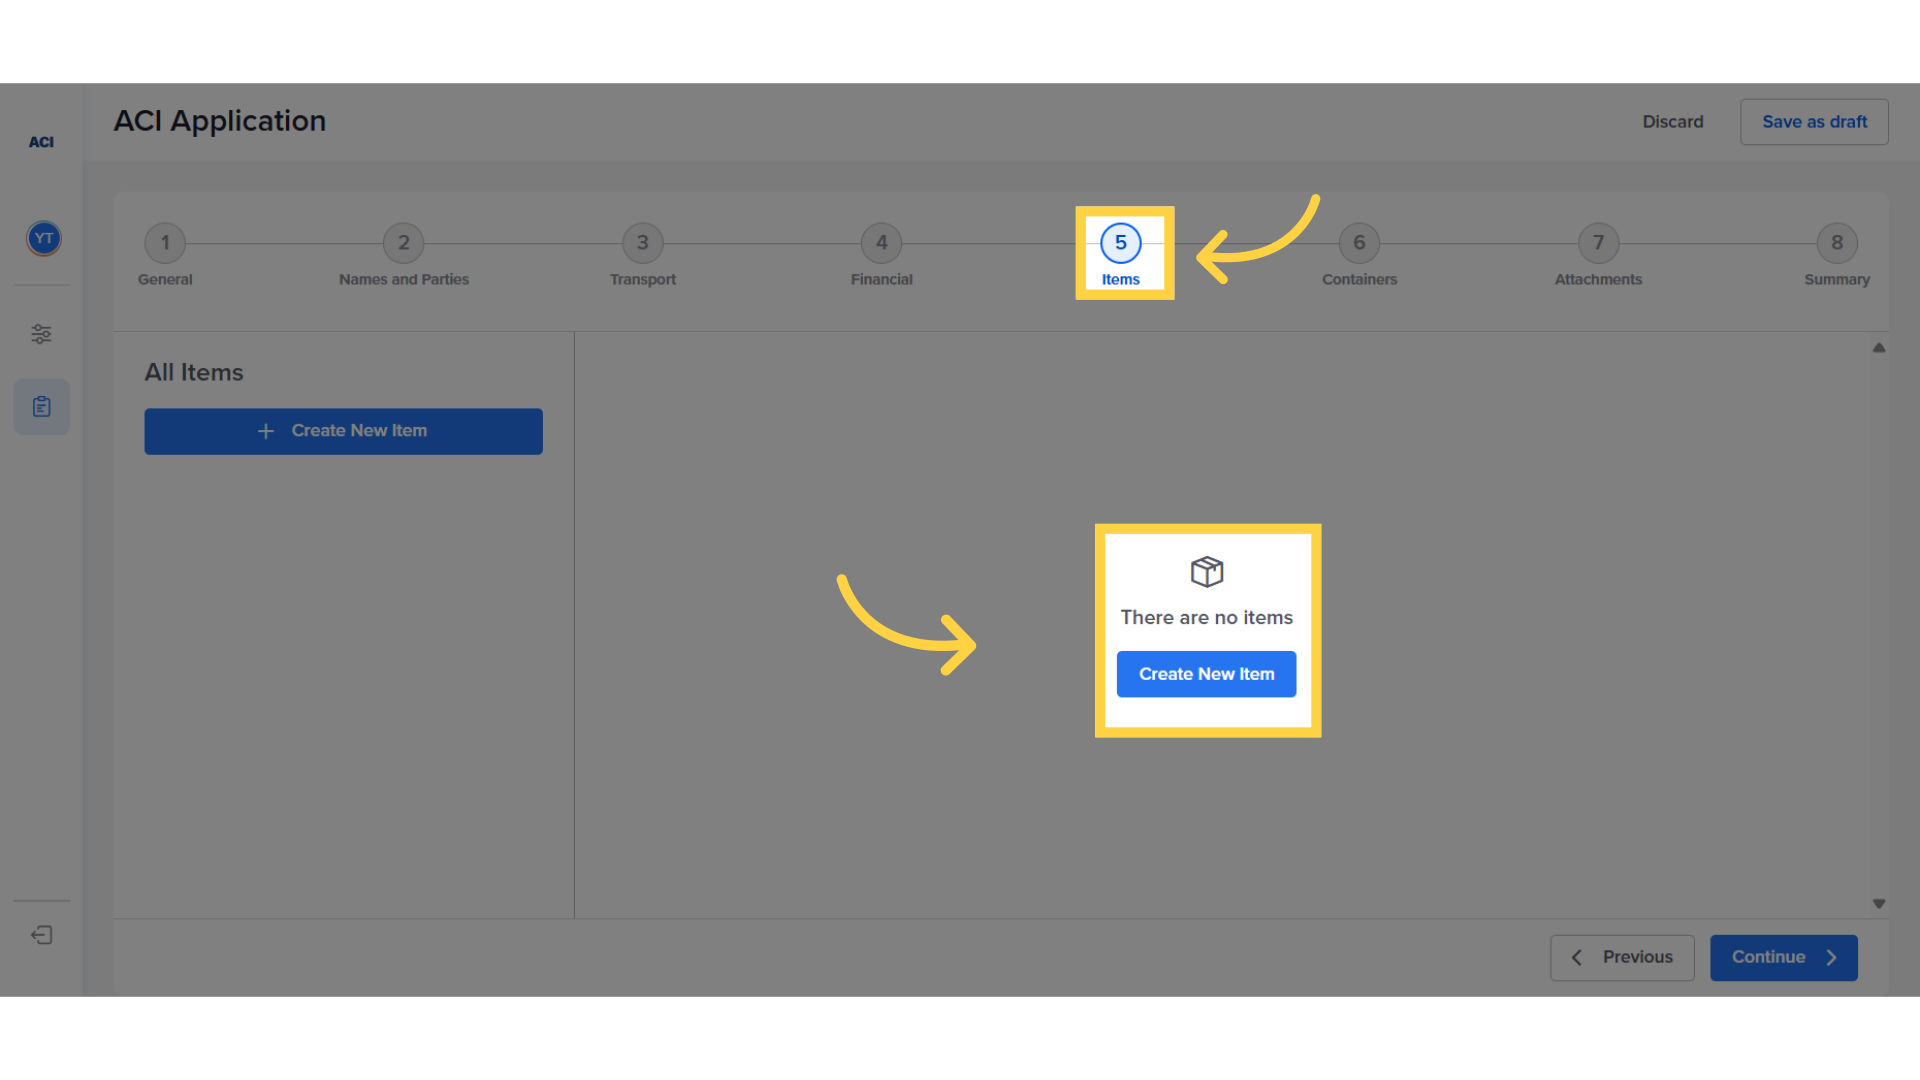
10. Insert " Item details"
The exporter proceeds by inserting details about the items being shipped. Click on "Create New Item" to add items one by one.
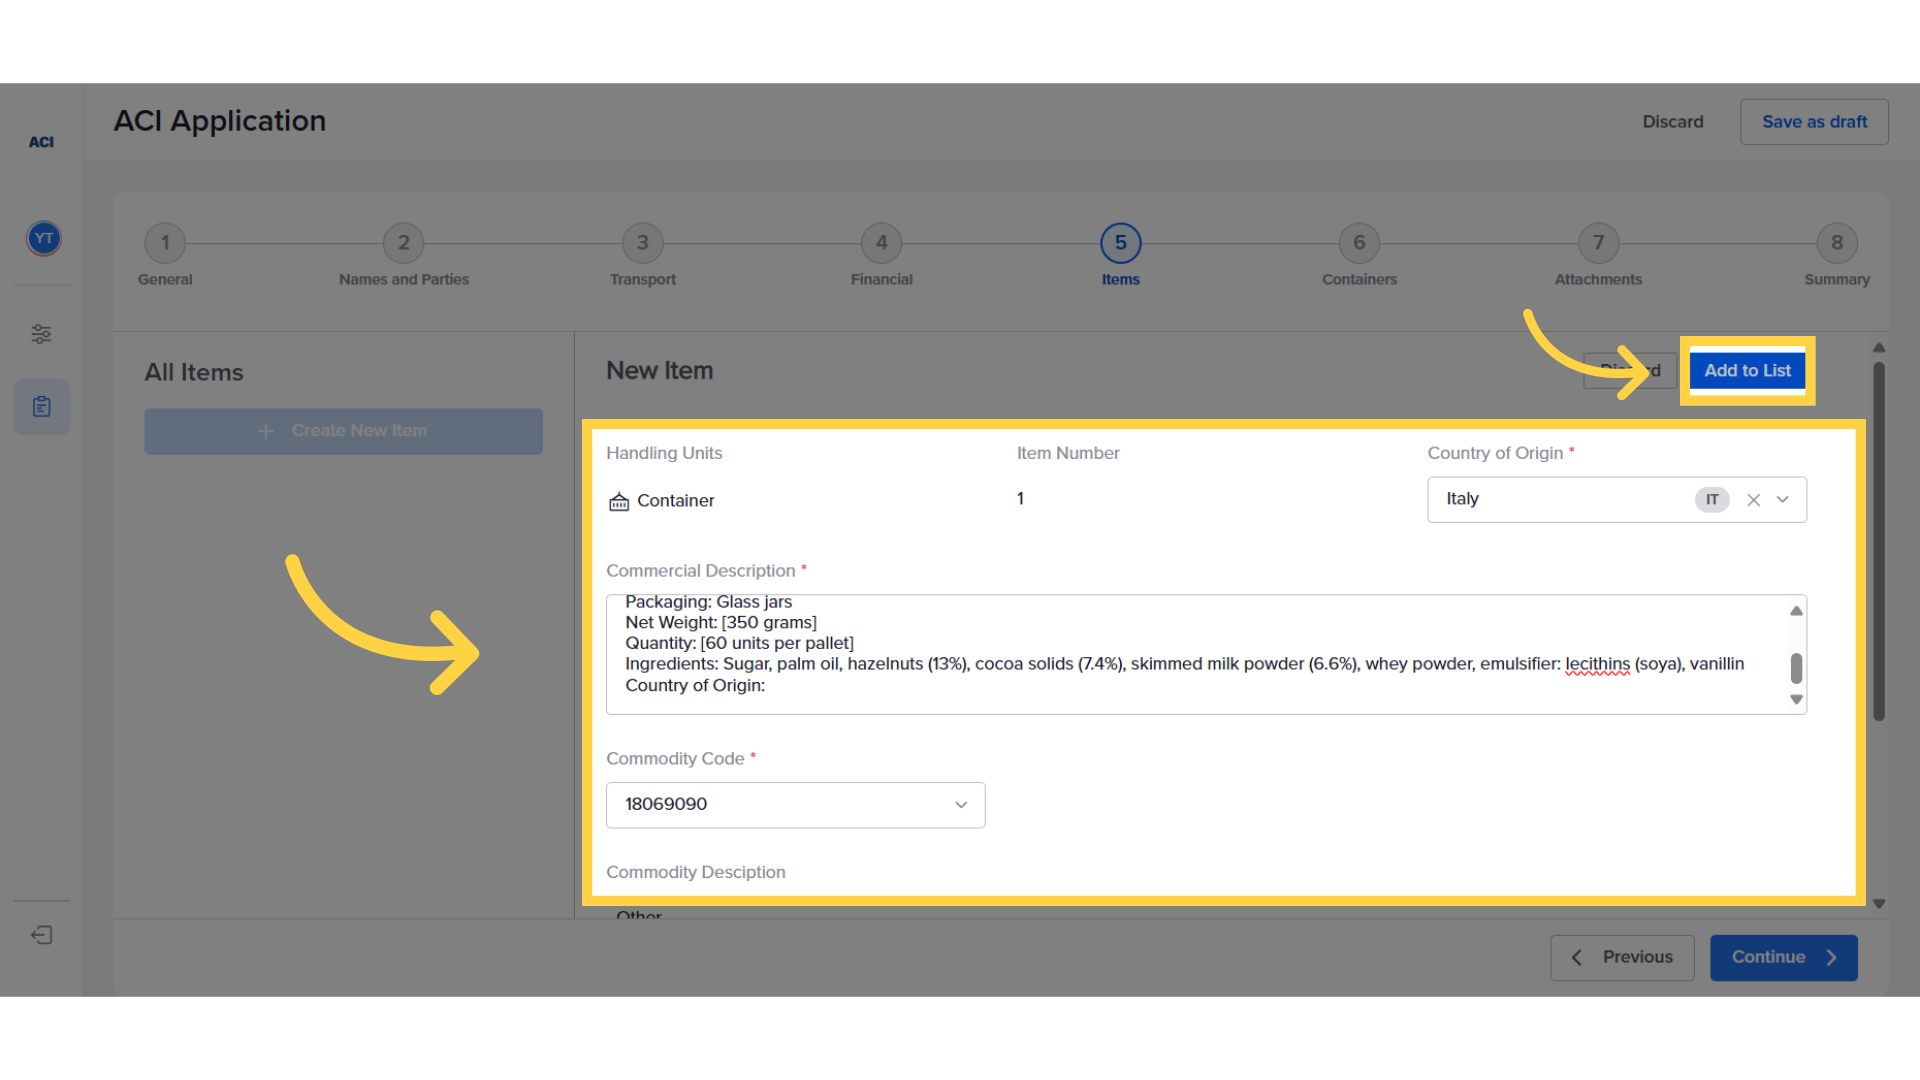
11. Add items one by one
Once each item details is filled, click on "Add to List" and ensure that the details are recorded and visible in the left panel.
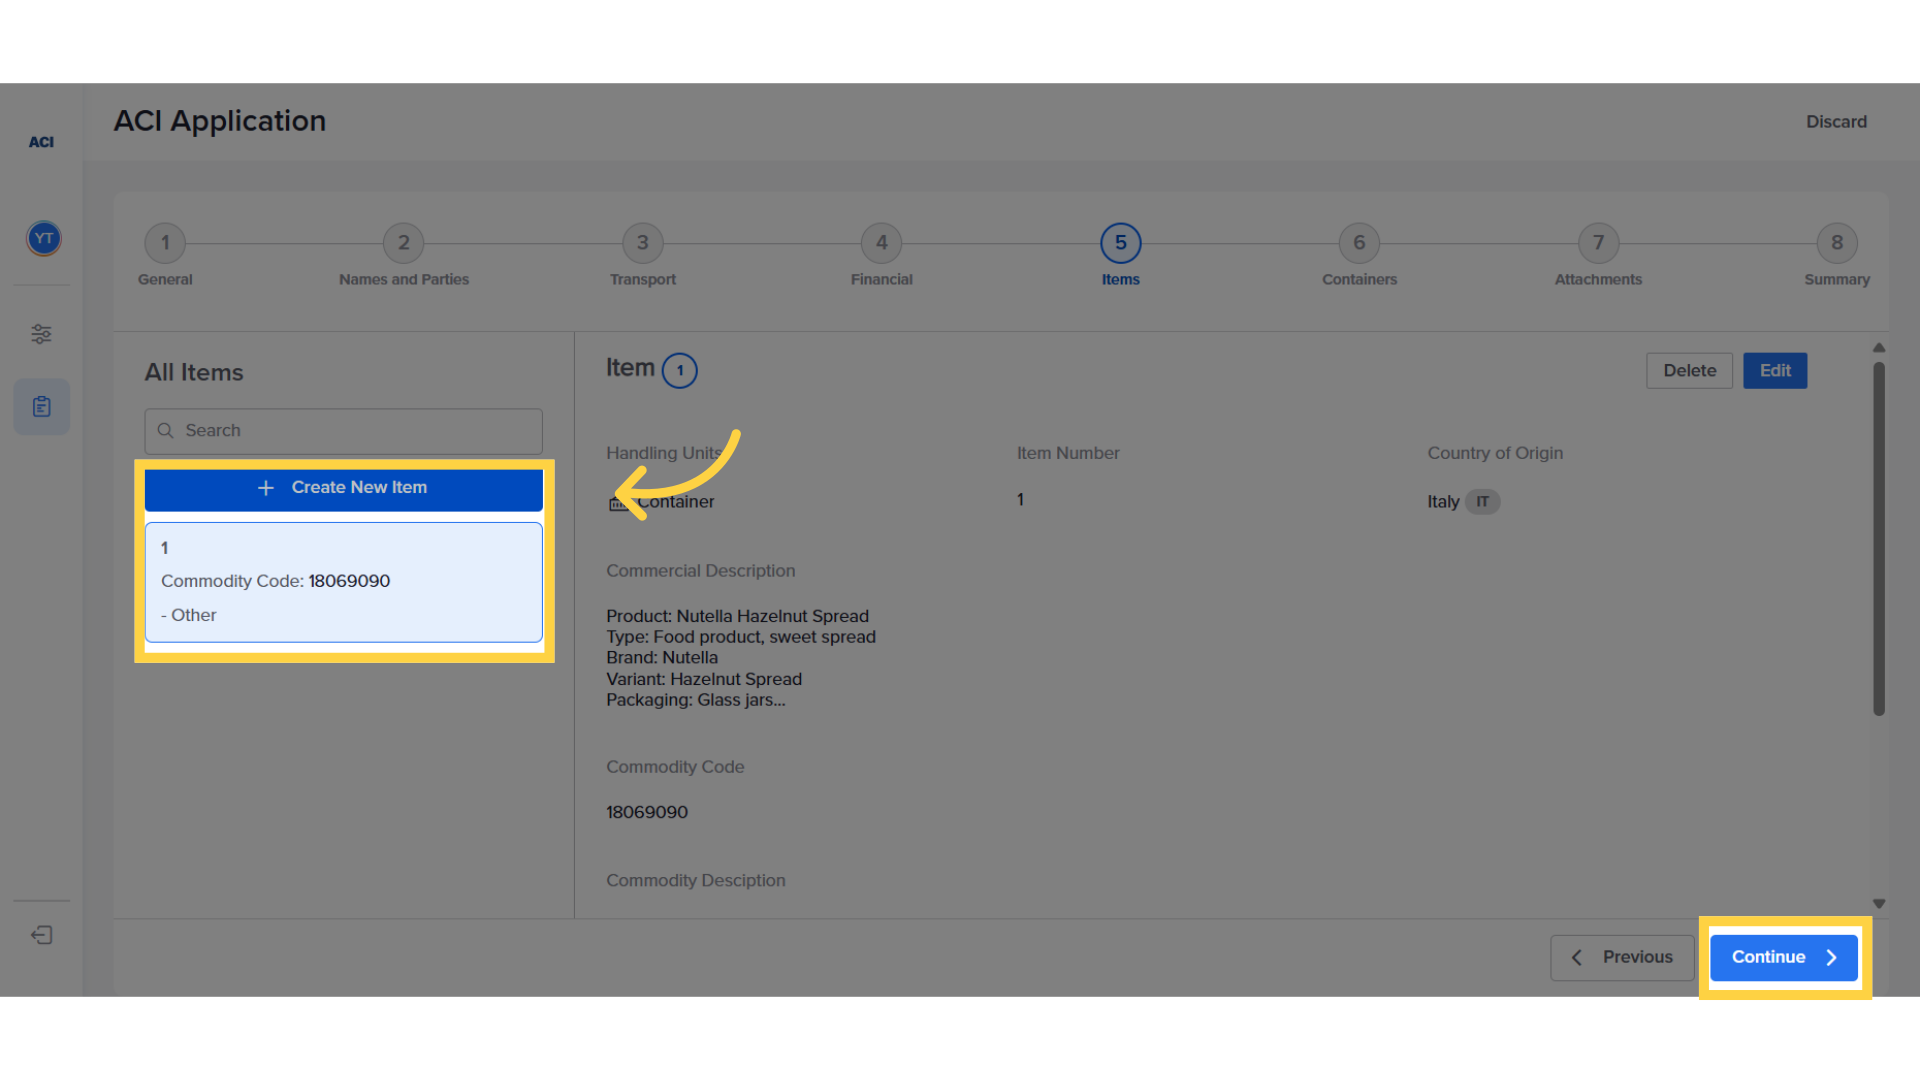
12. Complete all items
In case the exporter has more than one item in the shipment, they can add each item by clicking on the "Create New Item" icon. Repeat this process until all items information are filled. Afterwards, click on "Continue" to navigate to the next step in the process.
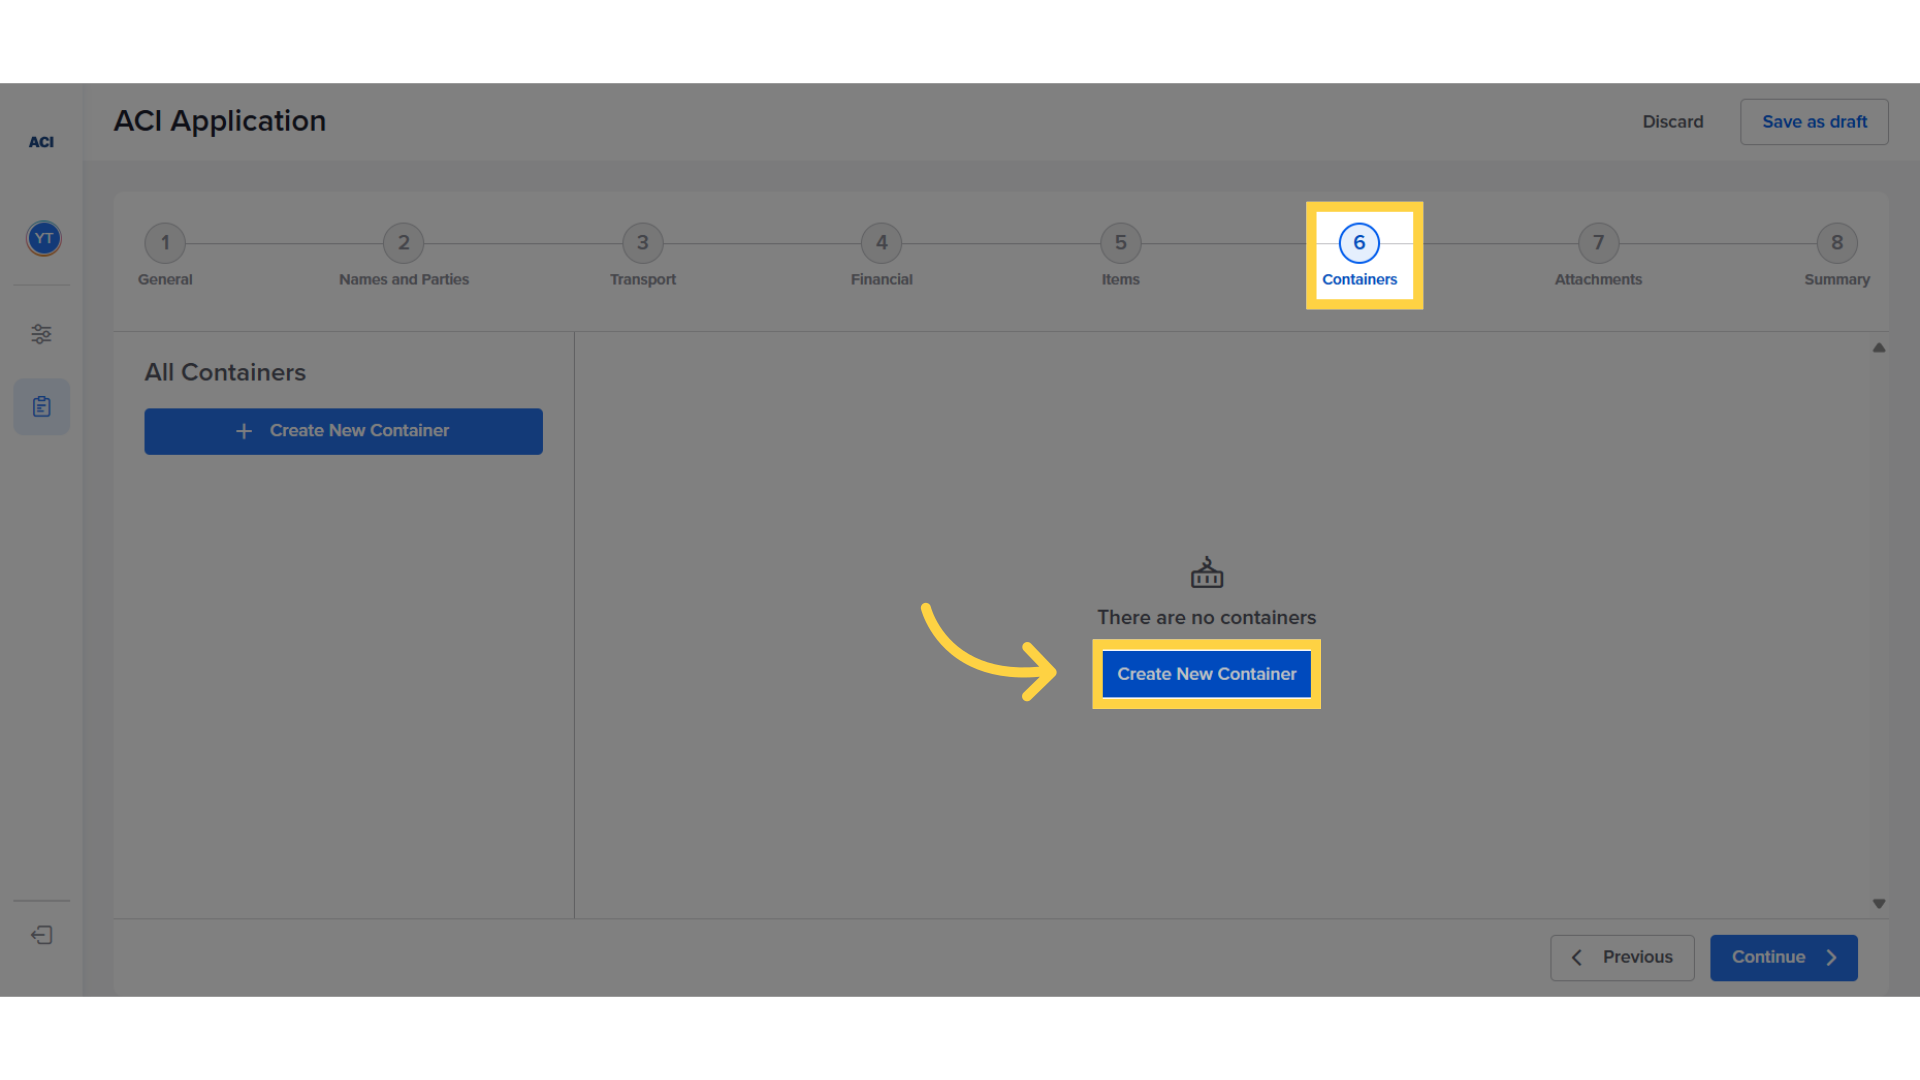
13. Fill container information
The next step involves inserting details about the containers. Press "Create New Container" to insert the required information.
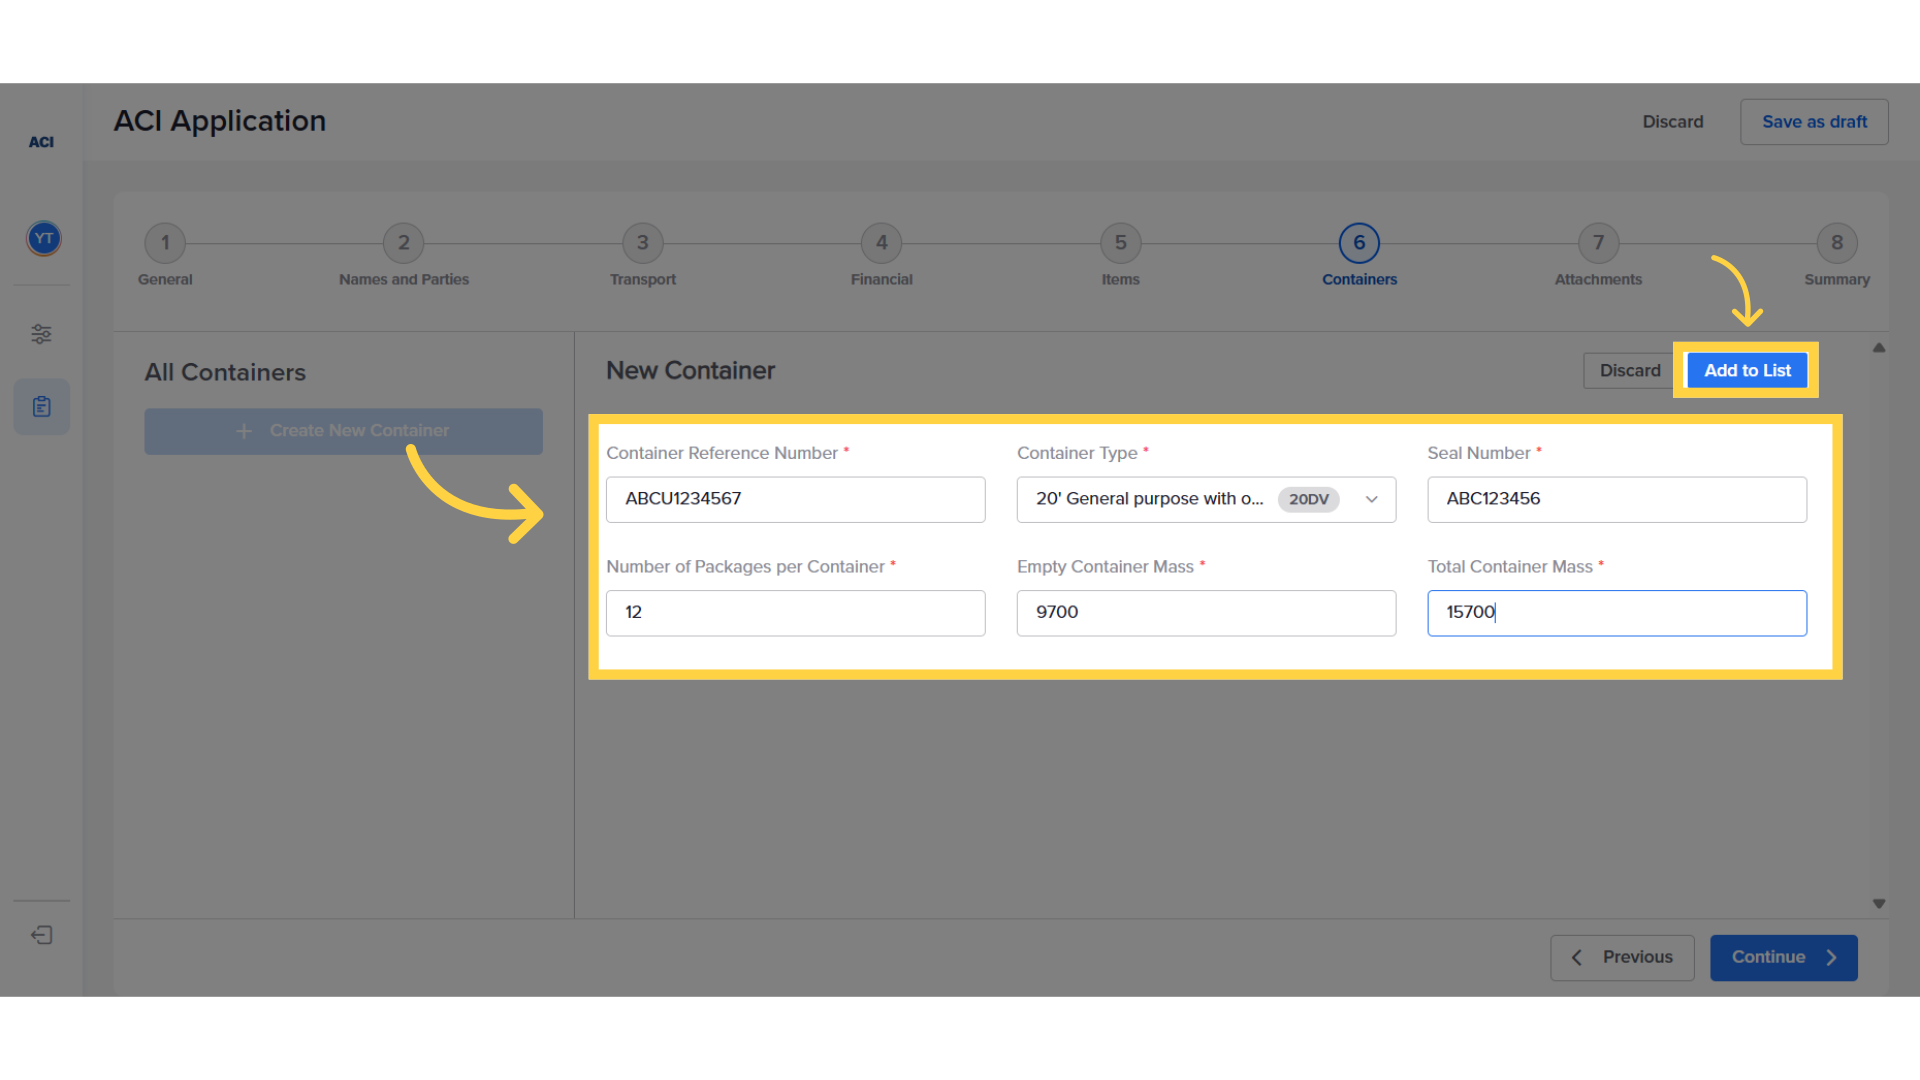
14. Add "Container details"
After filling in a container's details, click on "Add to List" to ensure that the details are recorded and visible on the left panel.
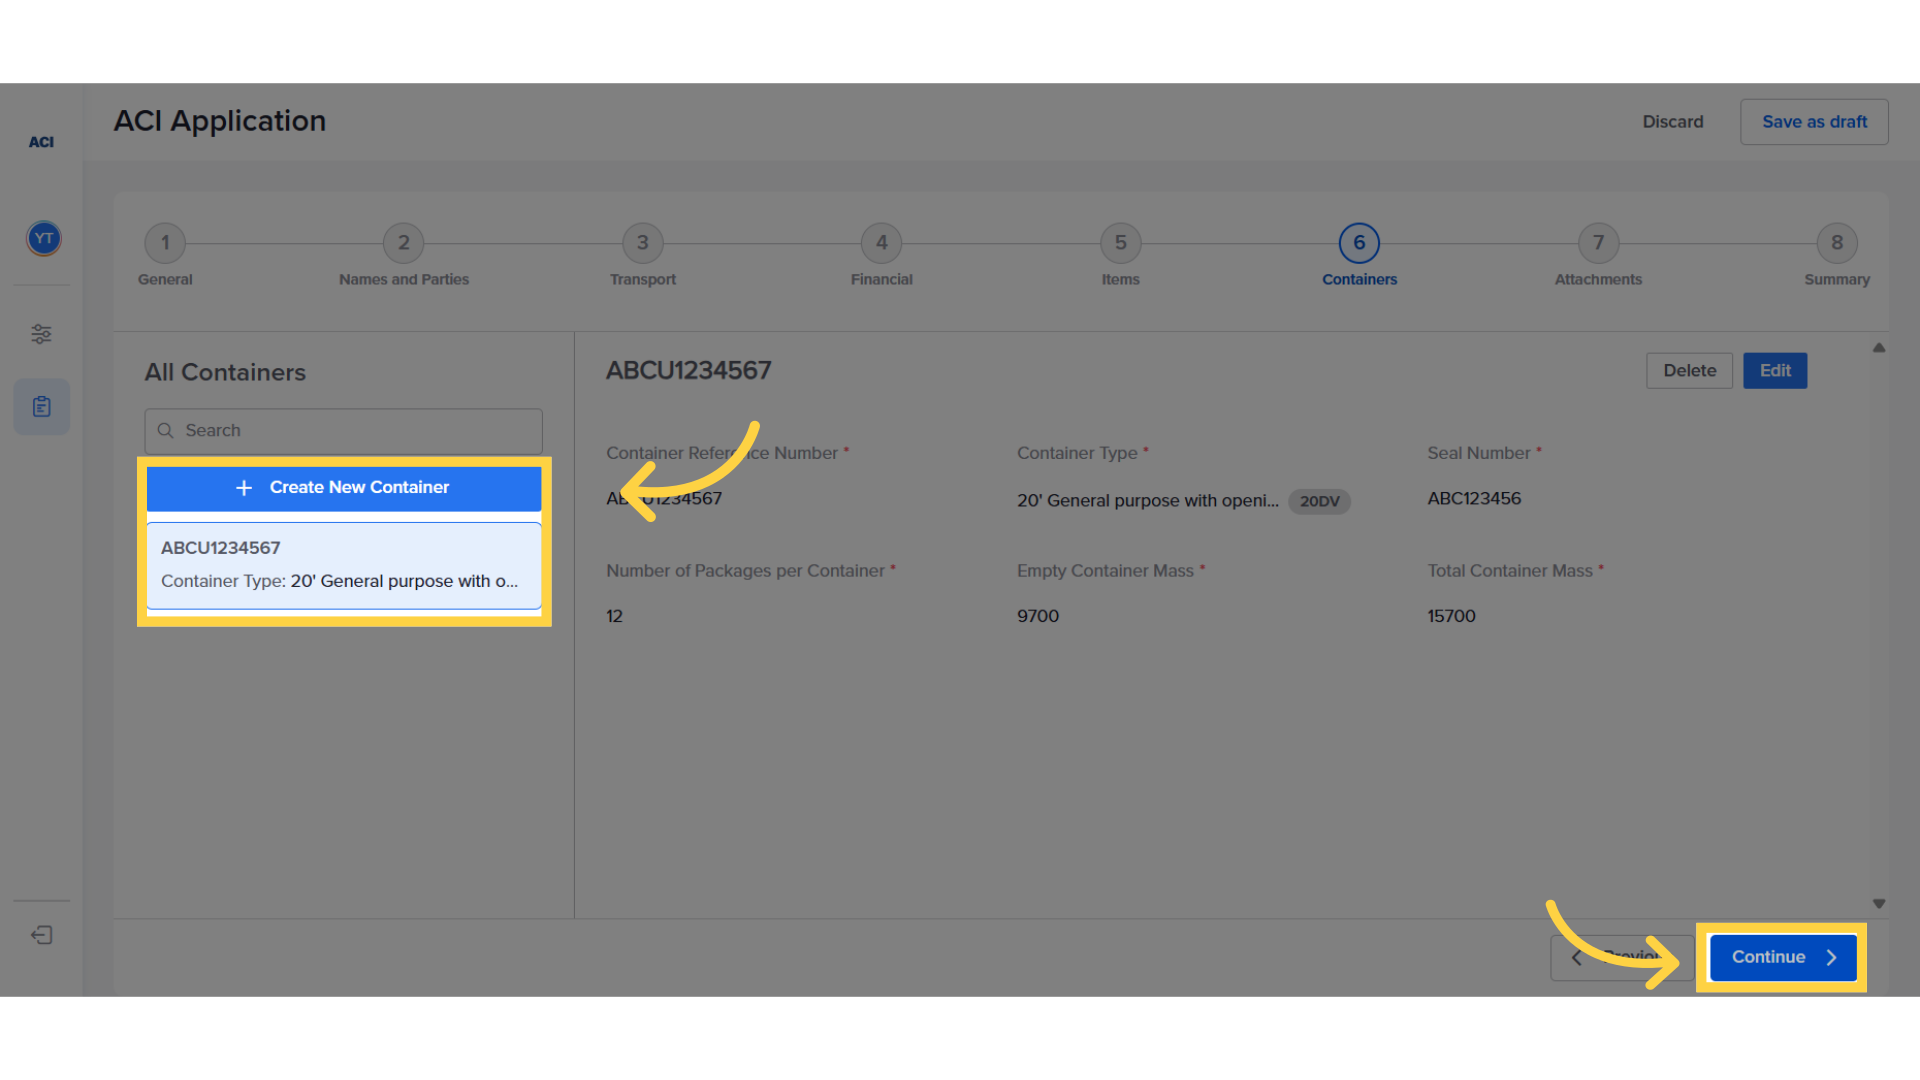
15. Add containers one by one
Add all containers one by one by clicking on the Create New Container icon. Repeat this process for all containers, and then press "Continue" to navigate to the next step.
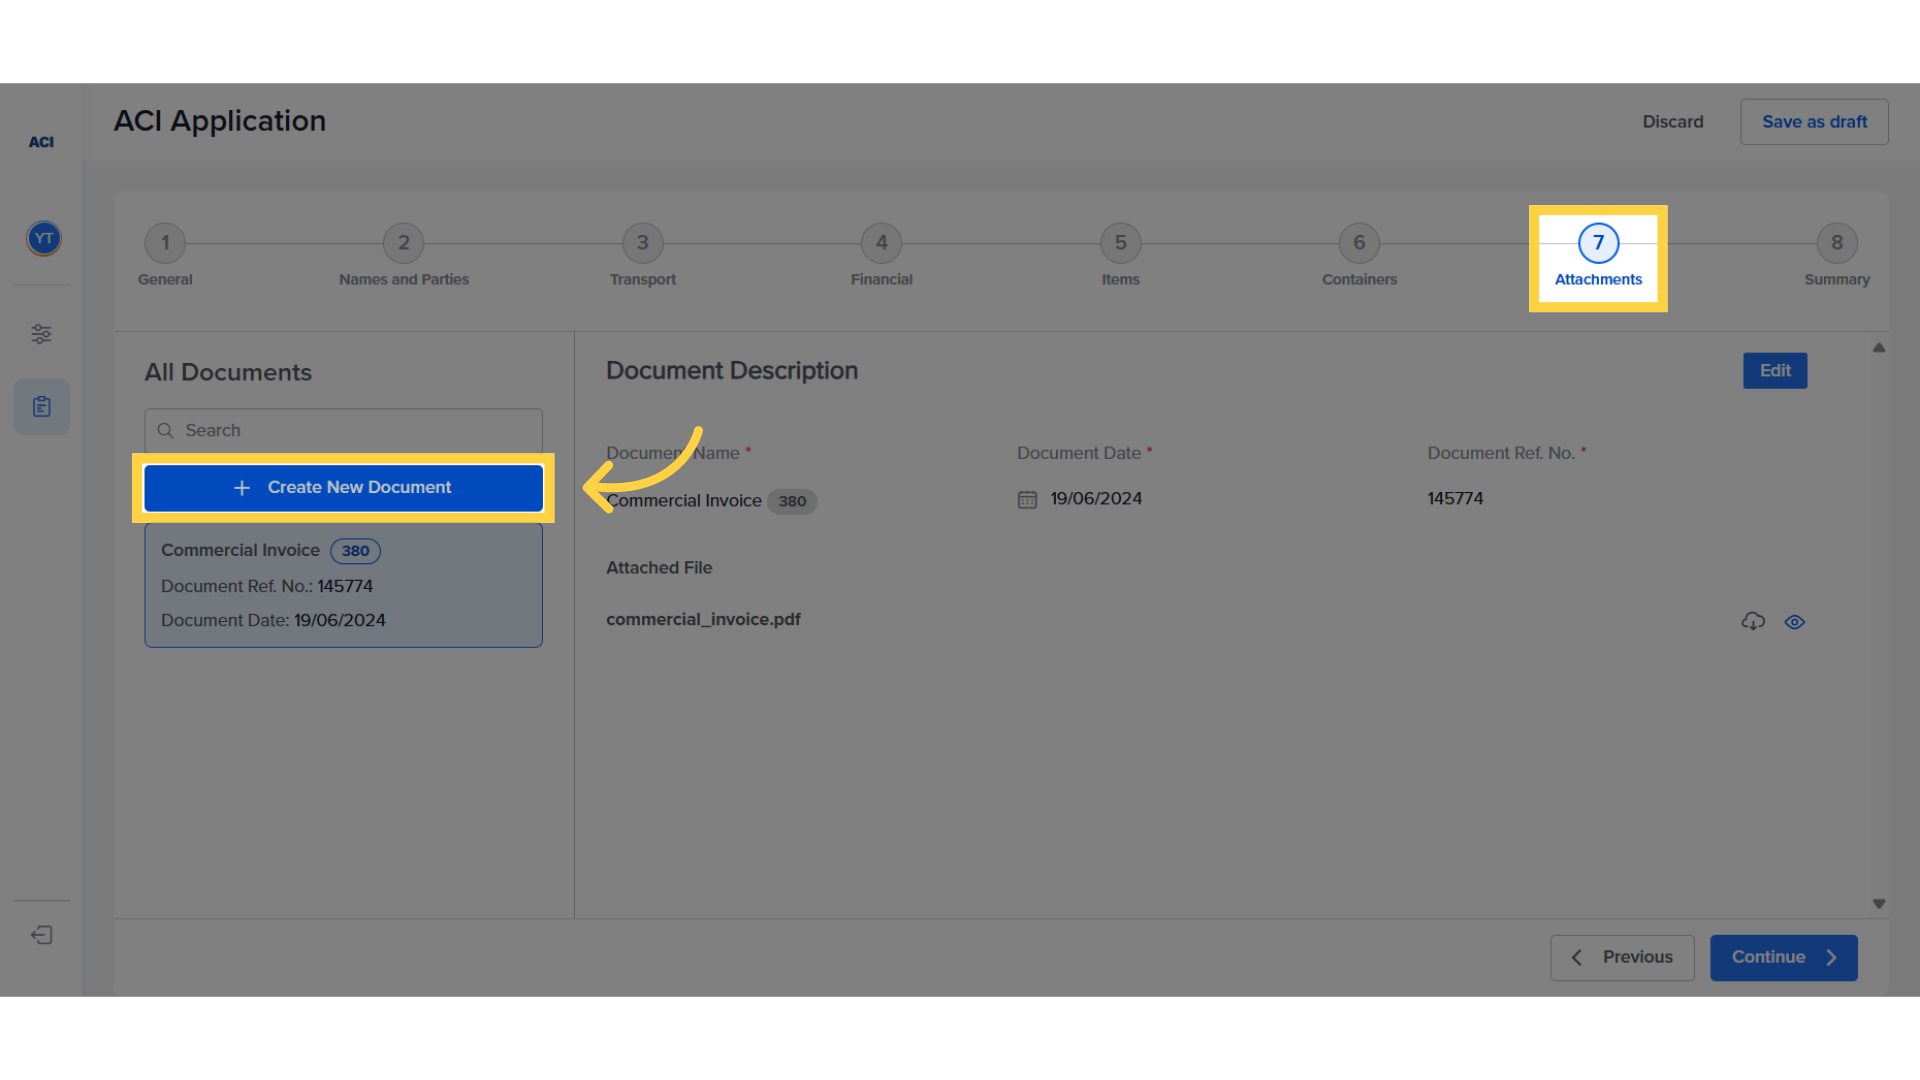
16. Fill required attachments
The exporter should proceed by attaching all relevant documents related to the shipment, such as the Certificate of Origin, Packing List, Booking Confirmation, and others as requested. To attach these documents, the exporter selects "Create New Document."
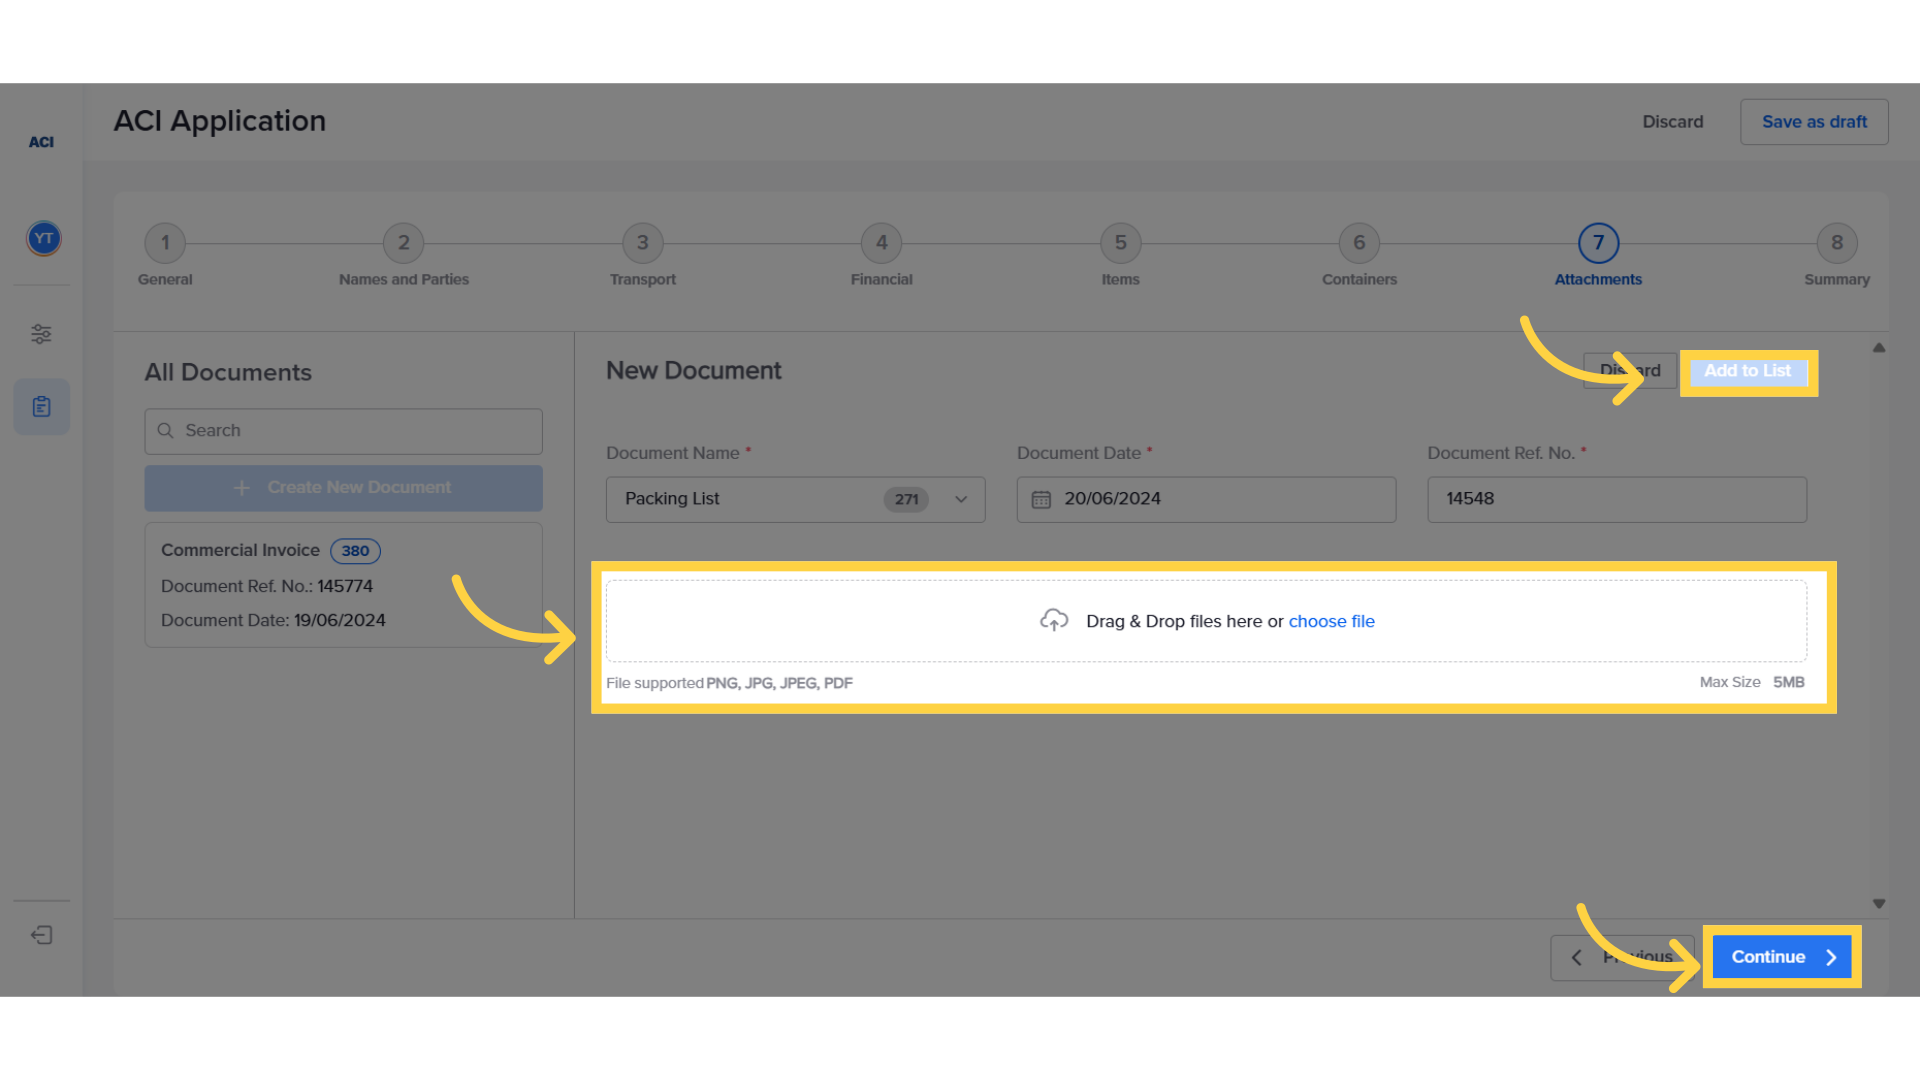
17. Select document type
In this example, if the exporter wants to attach the Certificate of Origin, they should select the appropriate Document Type, add the document date, and provide a reference for the document.

18. Attach the file in question
Upload the document in the Drag & Drop zone. Then, Click on "Add to List" to ensure it appears in the left panel. Note that you have to upload one file per type. If you want to upload multiple pages of a document, group them into one file and upload them. Finally, click on "Continue" to proceed to the summary page.
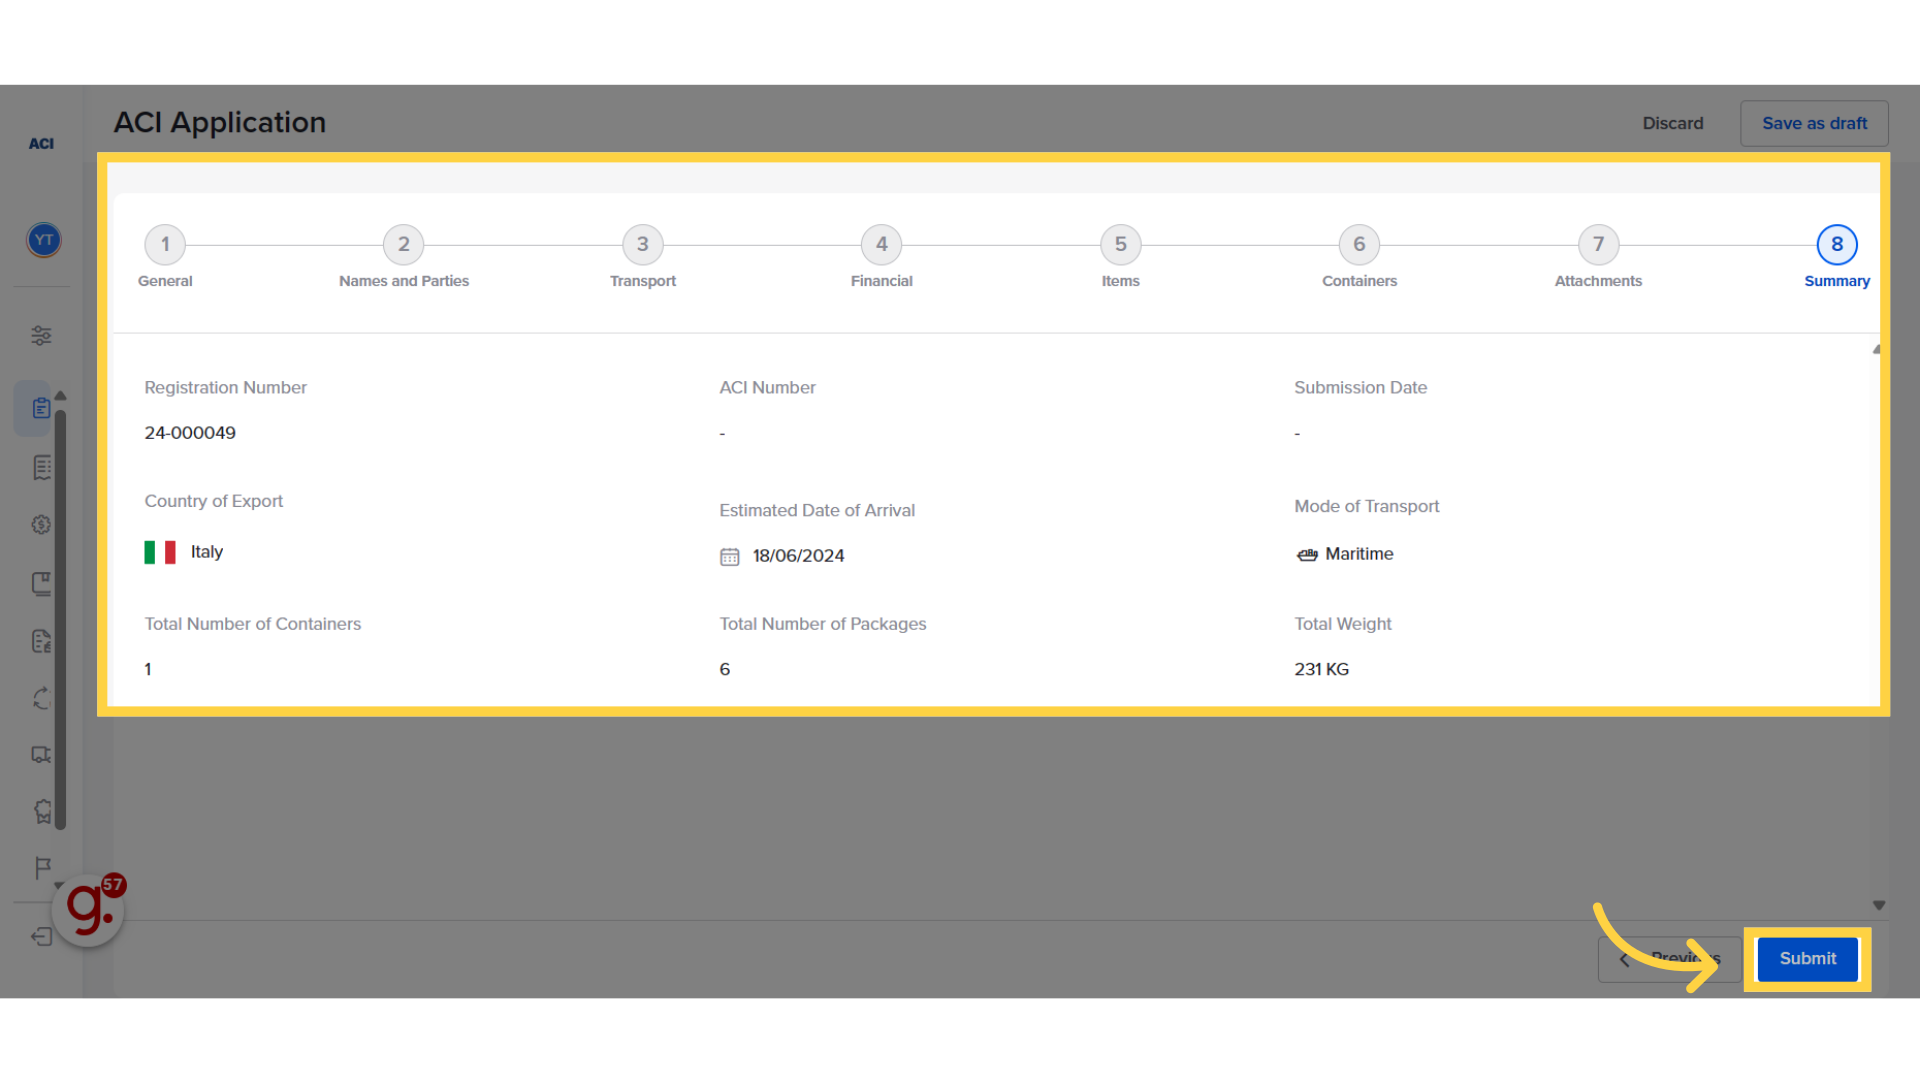
19. Check Summary tab and submit the ACI
This page includes a summary of the ACI information as well as the table of ACI fees. In the trial period there will be no fees shown. Confirm the ACI submission by clicking on "Submit". Any errors will be identified in the error modal. Fix all errors and click on "Submit".
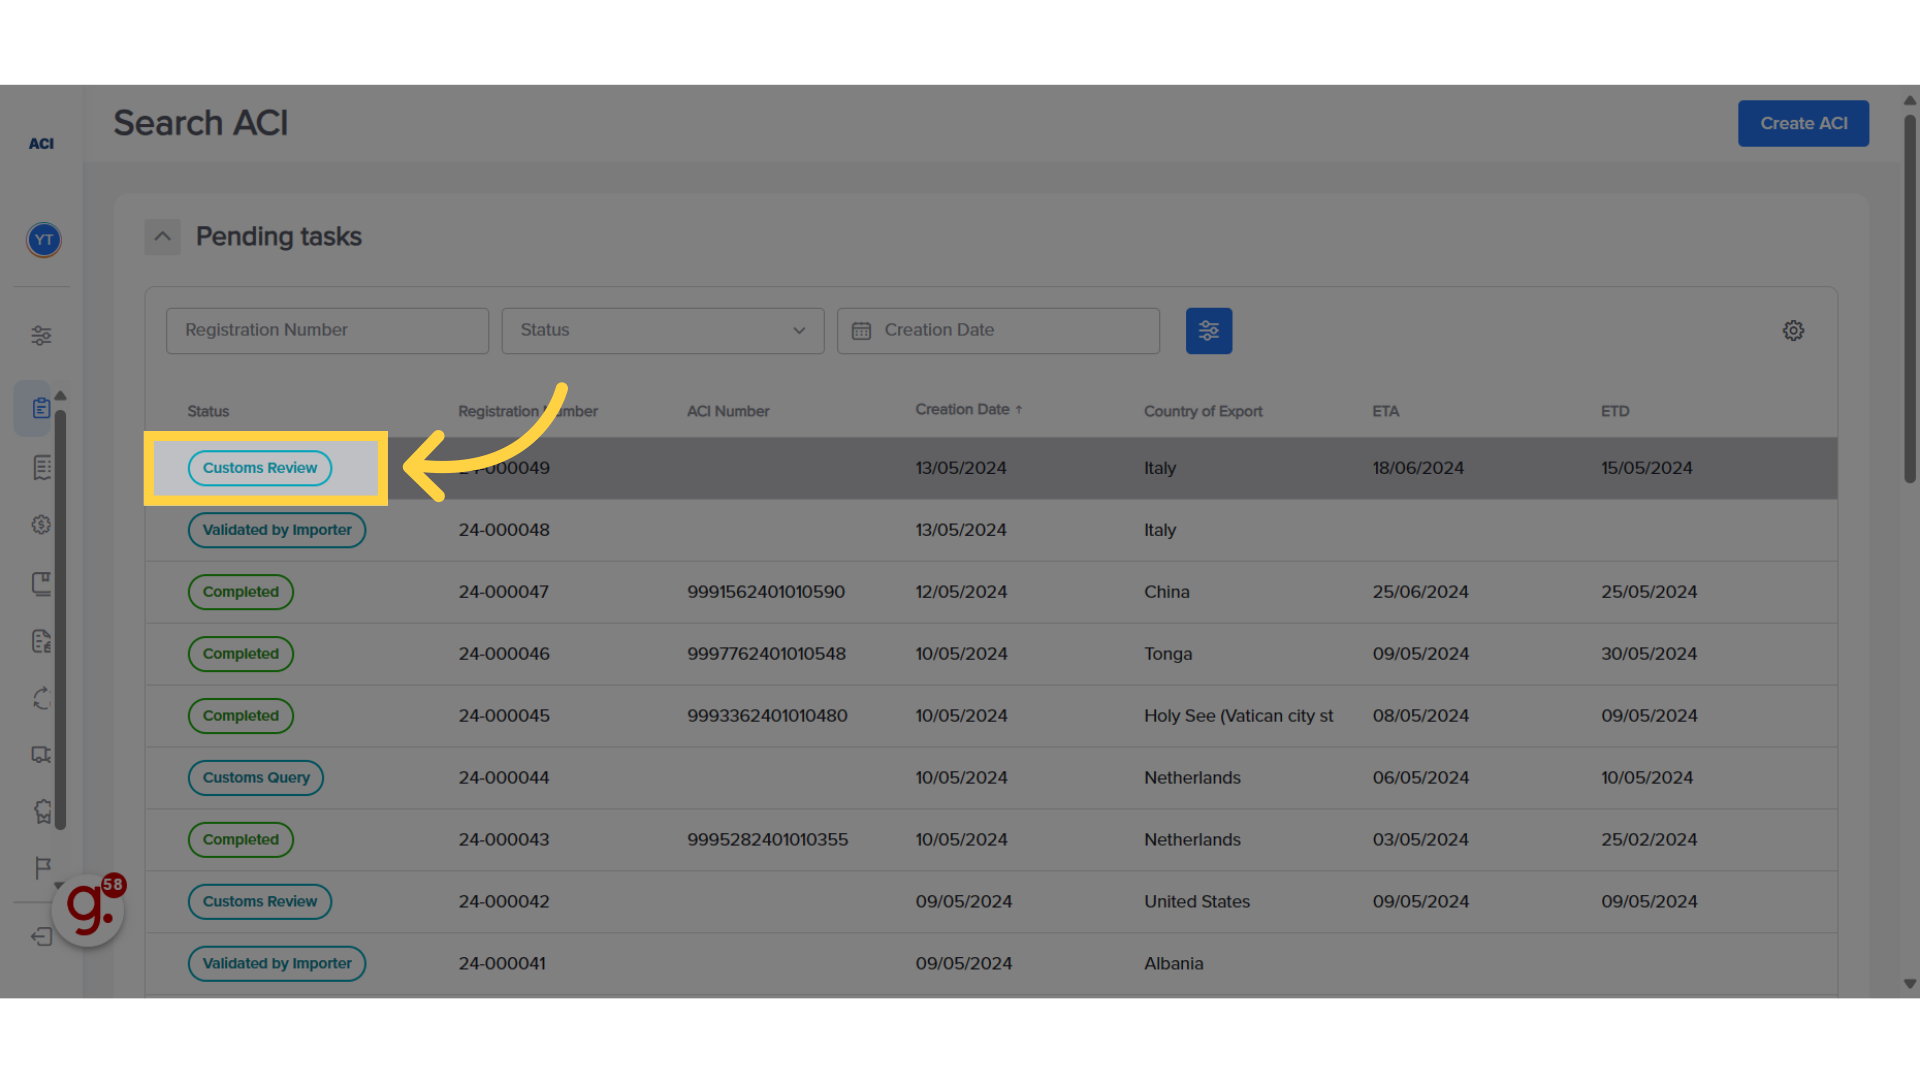
20. Check the ACI's updated status
After successful submission of the ACI, the transaction will move to "Customs Review".
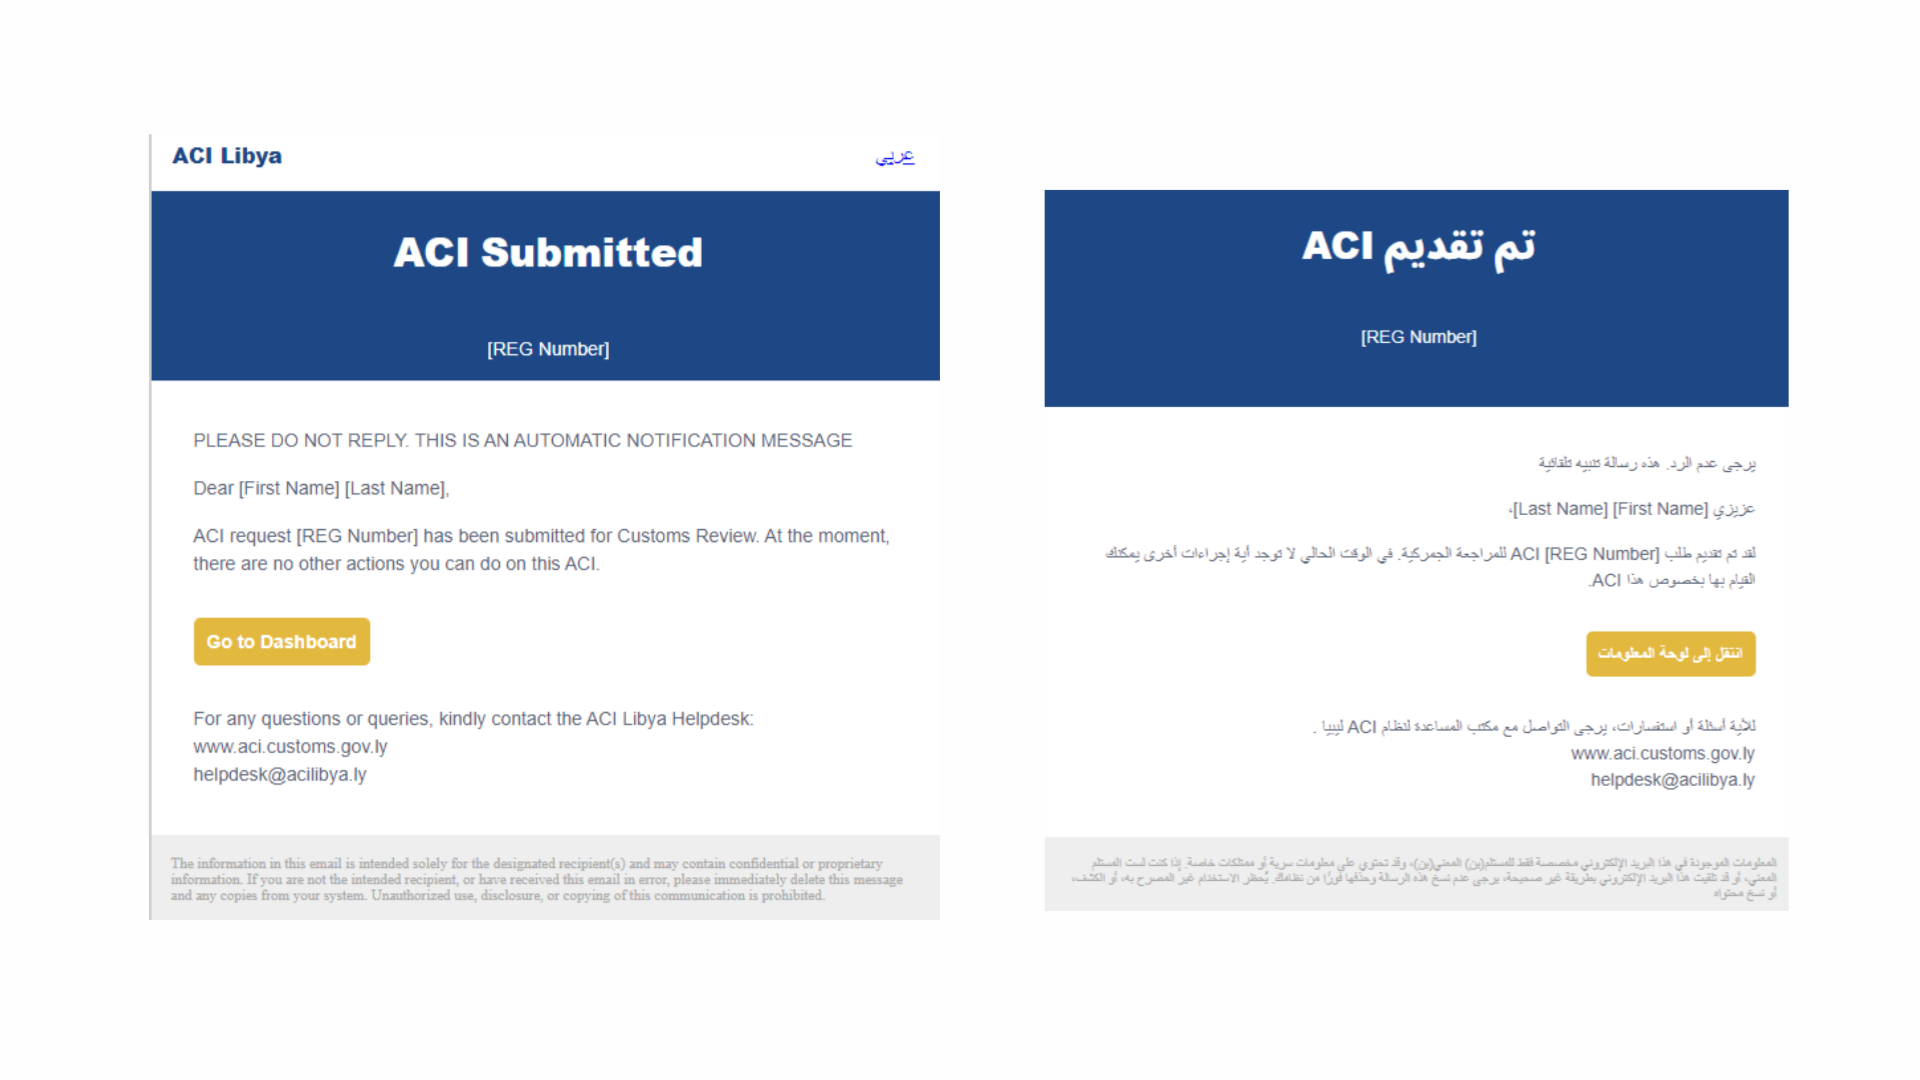
21. Receive submission confirmation email
The exporter will also receive an email confirming the submission.
The guide covered the process of completing the ACI submission on ACI Libya. For more information, please visit aci.customs.gov.ly
Related Articles
What to after ACI approval
Sharing the ACI with the shipping line and uploading the BOL (Exporter) Click here to watch This guide will walk you through the process of retrieving the approved ACI and sending it to the shipping line. Go to aci.customs.gov.ly 1. ACI Approval Once ...How to create an ACI
How to Create an ACI ( Exporter ) Click here to watch This guide will walk you through the process of creating an ACI and submitting it for Importer Review on ACI Libya. Go to aci.customs.gov.ly 1. Login The initial step is to access the ACI system ...How to respond to a query
Respond to a query ( Exporter ) Click here to watch This guide will walk you through the process of responding to an officer's query. Go to aci.customs.gov.ly 1. ACI in query status In case the Officer finds any information that does not match or if ...